Recipes

Tuesday, April 16, 2013

Lemon Vinaigrette

Copyright 2013 LtDan'sKitchen blogs
This is probably now my regular salad dressing and there are surprisingly quite a number of request for the recipe. The truth is, I just followed the basic recipe for a regular raspberry vinaigrette that I loved. I made some changes to the recipe by adding any flavor I want the dressing to impart depending on the type of greens or fruits I want to incorporate into the salad. The ingredient I play around with the most is the vinegar component. If I plan to include a citrus wedge into the salad, I usually cut the amount of vinegar in half and compensate for the difference with the citrus juice. This I think brings the whole dish into harmony in terms of flavor and texture. 

As such, I present a basic recipe that recently got a request so I had to go back and make the dressing with the proper measurements. For this recipe, lemon was incorporated since it is what I have in my fridge. You can definitely add the juice of an orange for a sweeter flavor if that is your preference.

Lemon Vinaigrette

juice of 2 ripe lemons + white wine vinegar to bring the volume to 1/2 cup
1/2 cup white sugar
1 tsp dried thyme (or Herbes de Provence)
2 tbsp Dijon mustard
1/2 cup extra virgin olive oil
salt and pepper

1. Mix the first four ingredients together. Stir well until the sugar has 
    dissolved and the mustard is incorporated well. 

2. Slowly drizzle in the olive oil while whisking to help emulsify the dressing. 
    Check for flavor and season with salt and pepper. 

3. Store in the fridge if not using right away. This will keep for about a week 
    in the fridge. Thaw to room temperature before using.  
 

Saturday, April 13, 2013

Risotto Alla Milanese

Copyright 2013 LtDan'sKitchn blogs
This was another recipe that was mentioned in a post I made a long time ago but never really bothered to include the recipe. Given the fact that my saffron spice is somewhere in between Chicago and the Philippines, I made do with something what they call as the "cheap substitute" for the real thing, the safflower. Just like saffron, it is made of dried petals with the same shade of crimson orange but with a lesser intensity in terms of color and taste. This risotto also uses bone marrow to lend a creaminess to the dish but I did away with it since one of my guests do not eat bone marrow. The dish still taste really good without it. If however you were lucky enough to find fresh bone marrow, use it to make the stock and spoon out the marrow and add to the risotto prior to serving.

Risotto Alla Milanese - Adapted*

1 onion, diced
1/2 tsp safflower threads
2 cups Arborio rice (Japanese sushi rice makes an excellent substitute)
4 tbsp unsalted butter
1/2 cup white wine
marrow from one large bone (optional)
8-12 cups beef broth
1/2 cup Parmigiano cheese, grated

1. In a deep pan, melt the unsalted butter over low heat. Add the onions and 
    saute until softened. 

2. Add the rice and mix well making sure the rice is coated with the butter. 

3. Add the white wine and raise the heat to medium. Continue to stir until 
    the liquid is almost gone. 

4. Add more broth by adding a cup or two in batches until the liquid is fully 
    absorbed by the rice. 

5. Once the rice reaches the al dente stage, add the bone marrow if using 
    and mix well. Add one last cup of broth and cook until absorbed.

6. Add the cheese and mix well and spoon out into bowls. Serve with a good 
    drizzling of olive oil. 

* Loren, Sophia, Sophia Loren's Recipes and Memories, GT Publishing, 1998: New York.
  

Lidia's Chicken Bundles (Fagottini di Pollo)

Copyright 2013LtDan'sKitchen blogs
I posted this dish when I started my blog about two years ago and this was one of the very favorites of a lot of people based on the number of views for this recipe. It did occur to me just recently however, that I basically posted the link to the original recipe without really bothering to write the recipe of my own version of the dish. It was then perfect timing when my colleagues were stopping by the house on our way to a conference last week. I invited them over for lunch and this is what I served them. I made a simple version of the dish doing away with the use of sage leaves. They are hard to find here in the Philippines and the dried ones are also a bit of a challenge to find. Still, the dish held up well with or without them. I also did away with the cheese, finishing off the dish with a good drizzle of extra virgin olive oil.

Fagotinni di Pollo - Adapted*

2 lbs chicken thighs, deboned and skinned
1 large carrot, shredded
1 large onion, shredded
3 stalks celery, shredded
2 large garlic cloves, crushed
1 lb fresh tomatoes, diced
1/2 cup tomato paste
1 tsp dried oregano
1 cup white wine
3 cups water
1 1/2 lb bacon
salt and pepper
8 tbsp olive oil

1.  Heat 2 tbsp olive oil and saute the onions, carrots and celery. season with 
     salt and pepper. Continue to cook until softened. Once slightly browned, 
     remove the pestata from the heat and allow to cool.

2. In a deep pan, heat 2 tbsp of olive oil over medium heat and add the 
    garlic. Saute until fragrant. Add the diced tomatoes and season with salt 
    and pepper. Saute until softened. Add the white wine and the oregano and
    cook until slightly browned. Add the water and the tomato paste and bring 
    to a boil. Lower the heat and simmer covered.

3. While the pestata is cooling and the sauce is simmering, prepare the 
    chicken by wrapping them in clingwrap and pounding them with a mallet 
    until flat. Set aside

4. To assemble, season the chicken pieces with salt and pepper and then fill 
    with about a tablespoon of of the cooled pestata. Roll into a wrap and seal 
    the wrap with the bacon strips. Secure with a toothpick if necessary. 

5. Heat the remaining olive oil in a pan over medium heat. Fry the chicken
    bundles in batches until the bacon is golden and browned. Transfer the 
    fried bundles into the simmering tomato sauce and continue to cook until 
    the chicken is cooked through. 

6. Adjust the sauce by adding water if a bit too thick and allow to thicken by
    removing the cover if a bit runny. Check for flavor and adjust accordingly. 

7. To serve, remove the toothpicks and drizzle with extra virgin olive oil. 

Lidia's Italy: Fagottini di Pollo
             

Tuesday, April 2, 2013

Butterscotch Bars (With Pictures)

Copyright 2013 LtDan'sKitchen blogs
This dessert bar has been driving me up the wall for almost three years now. After having obtained a recipe from a good friend, I tried the said recipe and I have to admit that it tastes pretty darned good. Almost as good as the ones they sell in my hometown. Bacolod City's Butterscotch bar is definitely a well-known treat all over the country and is always copied but never equaled. The recipe being a trade secret is as difficult to find. The recipe given to me was therefore a godsend but I have a lot of issues with it. While the taste is perfect, the texture is not. It has the tendency to underbake in the middle while it puffs up on all sides of the pan making it hard to correct this issue. Bake it long enough and you overbake the peripheral portion of the cake and underbaking it also leads to a soggy mess at the center. 

Addition of brown sugar to melted butter.
While still living in the US, I tried to correct this issue by replacing a portion of the flour with powdered milk which resulted to a cakey albeit delicious version. I also tried doubling the baking powder hoping that it will speed up the rising of the batter but it rose too fast it eventually fell flat. I tried molasses instead of brown sugar and this version  came out a bit too moist. I used less baking powder and it barely rose that I ended up with a clumpy bar. It made me think that maybe, it is a geographical problem. Humidity and altitude do affect how a cake bakes and maybe those are what's been causing these problems for me.

Eggs have been added to the sugar butter mixture.
When I went home last year, I eventually tried a different approach to the recipe and the first major change I tried was to use margarine instead of butter. I also switched to aluminum pans since I left my non-stick baking pans in the US. Surprisingly, it actually bakes evenly in my cheap baking pans. A second major change is how I prepared the batter. I decided to melt the margarine with the brown sugar over low heat until the sugar has melted but not caramelized. I then waited until it cooled down before I added the rest of the ingredients adding the baking powder last. Well, what do you know? It worked. After a little bit more fiddling, I decided to bring back the butter into the recipe and this new version is what I came up with. It is a combination of the original recipe and the one I modified using margarine. I eventually found out that butter compound is actually better than margarine so I made another switch. I also had to omit the addition of nuts due to my gout and the fact that my nephew is allergic to nuts. He actually likes this version and refers to it as the brown cake. 

Butterscotch Bars

1/2 cup unsalted butter*
1/2 cup butter compound*
2 cups dark brown sugar**
2 large eggs
1 tsp vanilla extract
1 tsp baking powder
2 cups flour
1/4 tsp salt
1/4 cup chopped roasted peanuts or cashews, (optional)

1. In a small pot, melt the butter and butter compund over low heat. Add the
    sugar and stir until melted. Turn off the heat. Preheat the oven to 325°F 
    and grease an 8" baking pan.

2. In a large bowl, sift the flour with the baking powder. Add the salt. 

3. When the sugar mixture has cooled, add the eggs one at a time. Mix well 
    after each addition.

4. Add the flour mixture and mix until just incorporated. Add the vanilla and 
    nuts if using and mix one last time. 

5. Pour the batter into the pan and bake for 25-30 minutes or until the cake 
    is set. 

6. Cool completely and cut into slices.

Addition of flour and vanilla extract.
The bar came out a bit cakey while still warm but it set nicely into a dense texture once cooled. I wrapped the pieces in colored plastic which is how they sell them here and over time, the texture changed into something similar to what is being sold in the local bakeshops. I think wrapping them up while they dry within the day changes the consistency into the desired sugary bar.

* Use 1 cup unsalted butter if you cannot find butter compound. I cannot recall the brand I used for the butter compound that I bought and I cannot seem to find it again. I have reverted to using New Zealand unsalted butter and it seems to do the trick. Local butters just do not have the same buttery taste.  

** I searched for the darkest brown sugar available in our local market without resorting to using muscuvado which is a raw form of brown sugar. The batter was a lot darker but the sweetness was just right. Overall, this is actually a very good version of butterscotch but I think I might keep working on it.
  

Saturday, March 30, 2013

Anda Curry (Egg Curry)

Copyright 2013 LtDan'sKitchen blogs
Egg curry was one dish that I was able to experience when I had dinner at an Indian friend's apartment three years ago. They cooked it the traditional way by preparing their own curry spice which to me was a surprise. I always thought you just bought a bag of curry spice and that was it. Never in my right mind did I think that there are actually variations to the "curry" powder being sold in stores. 

The dish they served was a bit thick on the sauce and was perfect when paired with naan or roti. I tried making my own version of this dish using a Madras curry powder mix and it was quite tasty. However, I found another version where pureed tomatoes are added to thicken the sauce and I thought I'd give it a go. Not having a functional blender at the moment, tomato paste will have to do however. I also decided to use quail eggs instead of chicken eggs. Aside from being aesthetically appealing, I just thought that quail eggs were not as imposing as chicken eggs in terms of eating them whole.

I made use of Asian chili powder when I made this dish and it came out really spicy. If you cannot take the heat, use the regular chili powder from McCormicks. It will give you a hint of heat but never too much that it will leave you gasping for water. I actually had to make some cucumber raita to help cool off the heat. Other than that, this is one tasty dish.

Anda Curry (Egg Curry), Adapted*

3 trays quail eggs, (24 pcs per tray)
4 tbsp vegetable oil
2 tbsp tomato paste
3 cups water
2 large onion, grated
3 garlic cloves, grated
1 tbsp fresh ginger, grated
2 green chilis, deveined, deseeded and diced finely
2 tsp coriander powder
1 tsp cumin powder
1 tsp garam masala
1/2 tsp turmeric acid
1/2 tsp red chili powder
salt and pepper

1. Boil the eggs in a pot with enough water. Cook until hard-boiled. Allow to 
    cool for 5 minutes and peel off the shell. Set aside. 

2. In a large pan, roast the coriander, cumin, and red chili powders with the 
    garam masala and turmeric acid over medium heat. Once they start to 
    release their aroma, add the oil and mix well. 

3. Add the ginger, onions, green chili and garlic. Saute until softened. Season 
    with salt and pepper. Add the water and bring to a boil. 

4. Once boiling, lower the heat to medium low and add the tomato paste. 
    Adjust the flavor with salt and pepper. Cover and simmer for 10 minutes.

5. Add the cooked eggs and simmer for another 5 minutes. Check for flavor 
    and adjust accordingly. 

6. Garnish with fresh cilantro leaves and serve with steamed rice. 

* Indian Curry: About.com

Thursday, March 28, 2013

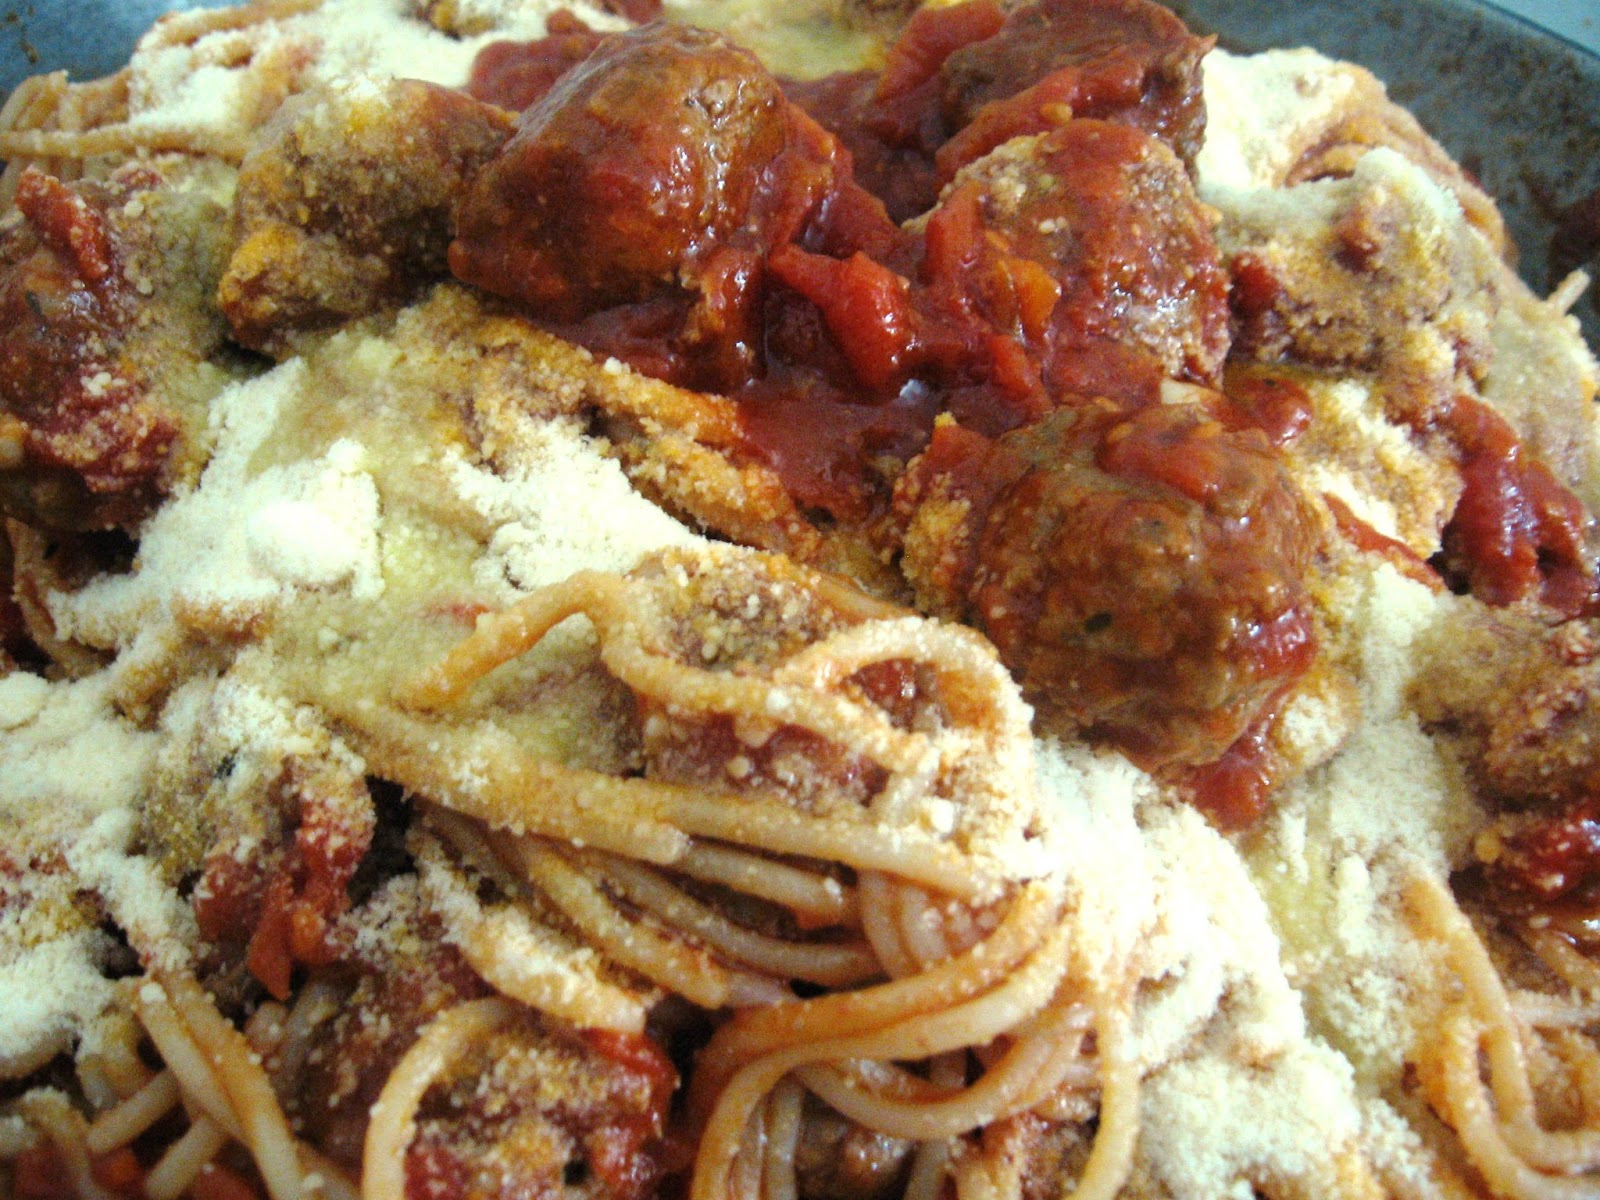
Meatballs and Sausages Spaghetti

Copyright 2013 LtDan'sKitchen blogs
This is my signature spaghetti sauce for adults whenever I am tasked to make spaghetti for a party. This sauce is a combination of three recipes that I compiled together. First off is the traditional marinara sauce from Sophia Loren's book. The addition of meatballs and sausages were inspired by a friend of mine who served her spaghetti this way during dinner at her place. My meatball recipe is a takeoff from Michael Chiarello's meatball recipe that I made more simple. And lastly, the third inspiration is from Lou Malnati's basic tomato sauce recipe which I found online.

Now, let's start with the sauce. As noted above, this basic sauce is inspired by Sophia Loren recipe and further improved upon by a recipe of Lou Malnati's signature tomato sauce which uses minimal ingredients and opts for better quality ingredients instead. This is really the key to this basic sauce that can be used for both spaghetti or even as a pizza base. The other secret is to let it simmer for at least 30 minutes until the sauce is all bubbly and thick. You can adjust the sauce to taste but I prefer mine on the sour side. 

The meatballs are also easy to make based on a recipe from Michael Chiarello. It gets fried until just browned and then they are fully cooked in the sauce. Simmering them in the sauce adds a new depth to their flavor. As for the sausage, my sausage of choice are mild Italian sausages but you can substitute them with any sausage you like. To finish, cook the dried spaghetti al dente and mix with the sauce and share this wonderful dish with the family. 

Meatballs and Sausages Spaghetti

Meatballs and Sausages:
2 lbs fresh Italian sausages
2 lbs ground pork
2 lbs ground beef
1 cup plain bread crumbs
1/2 cup shredded Parmesan cheese
1/2 tsp dried thyme
1 large egg
salt and pepper
4 tbsp olive oil + more if needed

1. Combine the ground meats, bread crumbs, Parmesan cheese, thyme and 
    egg in a large bowl and season the meatball mixture with salt and pepper. 
    Roll into 1-inch balls and set aside. 

2. In a frying pan over medium heat, cook the sausages by boiling them in 
    1/2 cup water. Once the water has boiled off, prick the sausages to 
    release its juices. Continue to cook until the sausages are browned. 
    Remove from the pan and set aside. 

3. Add the olive oil to the same pan and fry the meatballs until just browned. 
    Set aside.  

4. Save the oil used for frying the meatballs. 

Spaghetti Sauce:
4 garlic cloves, minced
4 lbs tomatoes, diced (or 2 -30oz canned diced tomatoes)
1/2 cup tomato paste
1 tsp dried oregano
salt and pepper

1. To make the sauce, saute the garlic in the frying pan used to brown the 
    meatballs and sausages. Cook until slightly golden.

2. Add the tomatoes and saute until softened. Add two cups of water and 
    bring to a boil. Once boiling, add the tomato paste, oregano and season 
    with salt and pepper. 

3. Cover the pan and lower the heat to low. Simmer for about 30 minutes. 
    Continue to check every 10 minutes and add some water when the sauce 
    gets too thick. 

4. Check for flavor and adjust accordingly. To finish off the sauce, slice the 
    cooked sausages into thirds and add into the sauce. Add the meatballs as 
    well and continue to simmer until ready to mix with the cooked spaghetti. 


Copyright 2013 LtDan'sKitchen blogs
To use as a spaghetti sauce, cook the spaghetti as per packet instructions while the sauce is simmering with the meatballs and sausages. Once al dente, drain the liquid and mix the cooked pasta with just enough sauce to cover the noodles. Drizzle with extra virgin olive oil and a topping of grated Parmesan cheese. Serve immediately.

Stewed Duck (Patotin)

Copyright 2013 LtDan'sKitchen blogs
Patotin is a dish I never understood growing up. It is quite popular especially during fiestas just as much as goat meat seems to be the star of the show on such occasion. Both are cooked as a stew or as a casserole and people go crazy over them. For me, give me your regular chicken and beef any day. However, there seems to be a mystique surrounding both dishes as the way they are cooked are very time and labor intensive and there is always the right way too cook them because otherwise, the taste will be a bit off. This must be part of their attraction since you don't usually serve them on a regular basis especially when you have to cook them for the whole day. 

I've cooked goat stew when I lived in Tennessee a few years back. It was a way for me to prove to my Indian friends that they don't have the monopoly on the most scrumptious goat stew in Asia. They loved what I cooked then but there will always be some cultural preferences but I was okay with that. Now, for the stewed duck, I really have no idea where to start with this. I remember my cousins growing ducks in our backyard for food but I never saw how it was prepared. I never tasted it nor did I show any interest in learning how to actually cook one. It was only last year when my friends and I had dinner together and we had this stewed duck that my friend made. Everyone loved it and I gave it a taste and it was delicious. Sadly, it wasn't enough to get me hooked. It was only after I made my cassoulet that duck became something I wanted to explore in the culinary sense. Thus, here is my take on my friends stewed duck recipe. She not only taught me her recipe, she also delivered the dressed ducks for free. Thanks Anna Mae. Love you always!

Stewed Duck (recipe of Anna Mae)

4-5 lbs whole duck, dressed
juice of 2 30-oz fruit cocktail
juice of 30-oz pineapple tidbits, reserve the pineapple for later
1.5 liter Sprite
1 cup vinegar
1/4 cup soy sauce
salt and pepper
3 bay leaves
4 garlic cloves, crushed
2 dried bay leaves
juice of 15 calamondin (or 2 lemons)
4 tbsp vegetable oil

1. Marinade the duck in a large glass bowl with the vinegar, garlic, juice of 
    the fruit cocktail, soy sauce, lemon juice, a tablespoon of salt and black 
    pepper. Store in the fridge overnight.

2. Heat the oil in a large frying pan and brown the marinated duck over 
    medium heat.

3. Transfer the duck into a deep pot and pour the marinade over it. Add the 
    juice of the canned pineapple, the bay leaves and the whole bottle of 
    Sprite and bring to a boil over medium high heat. 

4. Cover the pot and lower the heat to low and simmer the duck for about 
    3-4 hours or until the meat is tender. 

5. Add the sliced pineapples and check for seasoning. Adjust with salt and 
    pepper if necessary. Continue to simmer for another 2 hours. 

6. Uncover the pot and continue to simmer until the sauce has thickened and
    reduced to about 3 cups. Check for flavor one more time and adjust as 
    needed. 

The duck will be cooked thoroughly and will be falling off the bones. If you prefer your duck a bit less mangled and still intact, you can pull out the duck when it is tender and continue to cook the sauce until thickened. At this point, you can return the duck to finish cooking in the sauce. Let it rest for about 30 minutes before serving.