Recipes

Sunday, November 6, 2011

Shrimp Balls and Dumplings

Copyright 2011 LtDan'sKitchen blogs
Shrimps are usually not one of my favorite things to eat. As a child, I really had bad allergic reactions to crustaceans especially crabs. I remember my Dad's sister, Auntie Gonyang, coming for a visit every now and then and her choice of contraband on such occasions are crabs. I say contraband because she is not allowed to eat them. She almost always usually just came from a doctor's visit and was told a few hours before not to eat crabs and a few hours later, she is at the house eagerly awaiting for this treat with my Mom cooking the disallowed food item. Both she and my Dad are not supposed to be eating crabs since my Dad has his own allergies to them (which he happily shared with me) but they are happily munching along while me and my Mom would look on helplessly. 

Eventually, my allergic reaction to shrimps diminished and I could easily eat them now without having to take any medication. Crabs however, I avoid like the plague since I really still have bad allergic reactions to them. There is one exception however and if given the the chance to eat lobster for free, I'll happily take one of my allergy medicines and partake happily on such a feast. 

Copyright 2011 LtDan'sKitchen blogs
The recipe below is one I found online and have adjusted to suit my tastes. I've always loved the shrimp dumplings at the Canton house in Atlanta and this recipe is the closest thing in terms of flavor to the dish that I miss a lot. Granted that this recipe requires it to be fried in oil, I figured I could take the same recipe and use it in a dumpling and it will still be equally good. In this instance, I was proven right. 

Shrimp Balls and Dumplings - Adapted*
  
2 lb large shrimp (45), peeled and deveined
8 oz can water chestnuts (1 cup), rinsed and finely chopped
1 large egg, lightly beaten
3 tbsp pork lard
1 1/2 tablespoons rice vinegar
1 tbsp 
ginger, peeled and grated 
2 tbsp green onions, finely chopped 
2 tsp salt
4 tbsp cornstarch
2 cups panko (Japanese bread crumbs)
vegetable oil for frying

1. Pulse shrimp in a food processor until finely chopped. Transfer 
to a large 
    bowl. 

2. Add the water chestnuts, egg white, lard, rice wine, ginger, scallion, 
    salt, and cornstarch. Mix shrimp mixture vigorously with a wooden spoon 
    and throw it against side of bowl until combined well and compacted. 

3. Wet your hands with cold water and form teaspoons of shrimp mixture 
    into balls. Coat balls, one at a time, in panko, then arrange in 1 layer on 
    another wax-paper–lined tray.

4. Heat oil in a deep frying pan until the thermometer registers 375°F. Fry 

    balls in 4 batches, turning, 1 to 1 1/2 minutes, or until golden and just 
    cooked through. Transfer with a slotted spoon to paper towels to drain. 

Notes:
When all shrimp balls are fried, reheat if needed on a rack, set in a shallow baking pan until just hot about 2 minutes on a preheated oven at 425°F. This usually never happens as they disappear quite quickly. 

I like to serve this with sweet chili sauce and steamed rice. As is, they are also good as an appetizer with a fruity white wine. 


Shrimp Dumplings

To make the dumplings, you will need an extra egg and round dumpling wrappers. If you feel like trying out both dishes, the recipe above makes about 25 dumplings and 12-two inch shrimp balls. 

1. Beat the egg with 2 tbsp water and brush one side of the wrapper. Do this 
    individually.

2. Take about a tbsp of the mixture above and lay on the center of a 
    dumpling wrapper and gather the edges around the filling until you are 
    left with a small opening. Top with a small slice of shrimp. 

3. Repeat the procedure above until you have filled all the wrappers. Steam 
    for about 10 minutes and serve immediately. 

Note:
I like to serve my dumplings with a mixture of 2-3 tbsp soy sauce, 1 tsp lemon juice, a drizzle of sesame oil and a few turns of black pepper.  


Saturday, November 5, 2011

Prune and Walnut-Stuffed Pork Roast

Copyright 2011 LtDan'sKitchen blogs
Pork being the new white meat is actually a healthy option if you get sick of eating chicken. However, pork loin is so lean it tends to dry out when roasted or cooked in the oven for too long. So the trick is to underbake it a little bit and tent with foil as it comes out of the oven and that will bring it up to the optimal temperature where it becomes safe to eat it. Another option is to butterfly the loin and stuff with a topping that will lend its flavor as well as keep the meat moist during the cooking process. 

This recipe is from Dave Lieberman's book, Dave's Dinners. I've made this dish a number of times and it always comes out really juicy and just flavorful. I've paired this with a variety  of rice pilaf and they go very well together. This time however, I decided to pair it with soft polenta together with a serving of sauteed zucchini ribbons. 

Prune and Walnut-Stuffed Pork Roast - Adapted*

2 lbs pork loin
1/3 cup extra virgin olive oil
1 medium onion, diced
1/2 lb pitted dried plum, chopped
2 Macintosh apples, peeled, cored, chopped
1/4 lb chopped walnuts or pecans
1 tsp dried rosemary
1/2 lemon, juice and zest
salt and pepper 

1. Preheat oven to 350°F. Cut the pork horizontally to flay it open and create 
   a flat even layer of meat. 

2. Combine the rest of the ingredients except for the salt and pepper and 
    mix well. Season the meat with salt and pepper and spread about half of 
    the mixture over the flayed meat. 

3. Seal the meat with a twine by pulling both ends of the meat with the 
    filling in the middle. Lay flat on a baking pan and spread the rest of the 
    filling over the meat. 

4. Cover loosely with aluminum foil and bake for 1 1/2 hours. To serve, cut 
    the twine and slice the roast into thick wedges. Gather the sauce and the 
    rest of the filling and serve with the roast at the table.  

*Lieberman, Dave, Dave's Dinners: A Fresh Approach to Home-Cooked Meals, Hyperion, New York: 2006

Wednesday, November 2, 2011

Chicken Galantina

Copyright 2011 LtDan'sKitchen blogs
Chicken Galantina is a Christmas dish that I was introduced to during my college years. A cousin of mine started making them to order during the holiday season and during one of the family gatherings when I was home for a vacation, my Mom asked her to make one for the family. It was an interesting dish and one that is very rich and complex in terms of flavor and texture. Having ran out of ideas to cook for New Year's Eve last December, I decided to give it a try and it was definitely better that I anticipated considering that the only memory I had of how it was prepared was that it was baked until the skin was all golden and crisp.

Doing a bit of research, I found out that there are quite several ways of preparing this dish but I settled on something that was reminiscent of how I thought it was made by my cousin. I also decided to go with the most simple and straightforward version of the recipe which is always a plus. I have a cookbook from home and it includes a recipe of galantina but I also decided to check another resource of mostly complicated Filipino dishes, the Market Manila blog. After carefully considering the best route to tackle this dish, I settled on skipping the part where you boil the stuffed chicken before baking it to a crisp. I chose to steam bake it instead covered in foil and once cooked, I baked it uncovered until the skin turned golden brown.

Another thing to consider when making this dish is you have to be brave enough to debone a chicken. That or befriend your local butcher. After looking at youtube for videos on the process of deboning a chicken, it was actually quite easy and I am definitely not afraid if I have to do it all over again. Just make sure you have the right knife to do the job and that the knife has to be sharp. Also, make sure that that is the only task you have at that very moment. You don't want to lose a finger because you were distracted for one second. I also didn't go all out in deboning the chicken. I left the drumstick and the wings intact which did not affect the galantina whatsoever. Now, on to the recipe:

Chicken Galantina - Adapted

Copyright 2011 LtDan'sKtchen blogs
2 2-3 lbs roasting chicken
1 lb pork sausage
1 lb ground chicken
2 eggs
2 medium carrots, finely   grated
1/4 cup sherry or white wine
1 medium onion, finely   chopped
gray salt
1/4 tsp black pepper
1/2 lb ham, finely   chopped
1 lb bacon
1/3 cup pistachio nuts
4 tbsp butter, melted

Gravy

4 carrots
2 onions, quartered
4 cups water
6 cloves garlic
4 celery sticks
1/4 cup flour
4 tbsp butter
4 cups chicken broth

1. Debone the chicken and set aside in the fridge.

2. Combine the filling ingredients except for the bacon and the nuts and  
    check for flavor by taking a tsp of filling and cooking it in the 
    microwave. Adjust with salt and pepper. Let the filling mix rest in  
    the fridge for about 30 minutes.

3. To stuff the chicken, Lay the chicken flat and pat dry with paper  
    towels. Season with about a tsp of salt and a few turns of black  
    pepper. Layer the bacon across the chicken and pile on the filling  
    evenly. Sprinkle with the nuts and bring the edges together. 

4. Sew the edges together with a kitchen twine and a needle and lay the
    chicken, cut side down on a foil. Season the chicken with more salt  
    and pepper and cover loosely with another piece of foil. Crimp the
    edges and place on a baking rack in a roasting pan. Add the  
    first five ingredients for the gravy on the bottom of the rack.

5. Bake in a preheated oven at 375°F for one hour and a half. Remove 
    the roasting pan from the oven and remove the top foil and let the 
    drippings drain into the pan over the roasted vegetables. Brush the 
    chicken with melted butter. Return the roasting pan to the oven and 
    bake the chicken until the skin is golden brown. Remove the rack and 
    let any residual drippings collect into the roasting pan. Set the 
    chicken aside and allow to cool still partially covered in foil.

6. Add the flour and butter to the roasting pan and cook over medium 
    high heat until incorporated. Add 2 cups of broth and strain the 
    mixture over a sieve into a clean pot while mashing the roasted 
    vegetables. Heat the gravy over medium heat and adjust 
    the texture by adding the rest of the broth until the desired 
    consistency is achieved. Correct the flavor with salt and pepper.

7. Serve the galantina warm or at room temperature with the warm    
    gravy.

Monday, October 31, 2011

Chicken ala King

Copyright 2011 LtDan'sKitchen blogs
Chicken ala King came into prominence in the late 80s and early 90s. Every single party, this dish is always present. Even my Mom was excited about this dish especially when I learned how to make it. As a student in Manila, these were sold in specialty bakeries served in a hollowed-out bread.  Despite how tempting it looked, I was definitely over it since it was just everywhere. It has been some time now though since I last made this and it might be time to revisit this simple dish. I'm using a loosely adapted version from the Food Network Kitchens after making a lot of changes to accommodate my preferences. 

Chicken ala King 

Copyright 2011 LtDan'sKitchen blogs
3 lb deboned chicken, diced
1/4 cup plus 1 tbsp 
  unsalted butter
2 tbsp olive oil
1 large shallots, minced
2-3 cloves garlic, minced
1/2 cup flour
1
/2 cup white wine
3 cups chicken broth
1 tbsp minced 
parsley
1/2 tsp thyme
salt and  pepper
pinch cayenne pepper
pinch freshly grated 

  nutmeg
1/2 lb Portabello mushrooms, diced
1/2 cup heavy cream

2 medium carrots, diced

1. In a large saucepan over medium heat, melt 1 tbsp of butter with the oil 
    and saute the shallot and garlic until softened. Add the thyme and saute 
    for another minute. 

2. Add the chicken pieces until it loses its pink color. Season with salt and 
    pepper. Add the mushrooms and carrots and saute until golden brown, 
    about 5 minutes. Season with salt and pepper and transfer to a bowl and
    set aside.

3. In the same pan, melt 1/4 cup of the butter over medium heat and 
    sprinkle in the flour, and cook, stirring with a wooden spoon for 2 
    minutes. Whisk in the sherry and broth and mix well to avoid lumps. 
    Bring to a simmer while stirring and return the chicken and vegetables. 
    Cook for 15 minutes, stirring frequently.

4. Check for flavor and season with the salt and pepper. Whisk in the 
    cream and bring to a simmer. Add a pinch of cayenne and nutmeg.  
    Cook for another 10 minutes until the sauce is thick. Serve immediately 
    in baked puff pastry cups and garnish with fresh parsley. 

Sunday, October 30, 2011

Pumpkin Roll

Copyright 2011 LtDan'sKitchen blogs
Pumpkin Roll is my answer to pumpkin pie for Thanksgiving dinner. I have baked pumpkin pie almost every year not for myself but for my friends who really love them. Personally, I'm not too fond of them and I prefer something made with chocolate so this is a compromise for me. This recipe is based from the Joy of Baking website and I added some little changes to the recipe. I've made this so many times and it never fails to impress. 

Pumpkin Roll - Adapted*  

3/4 cup flour
 
1/2 tsp baking powder 
1/2 tsp baking soda 
1 tsp ground cinnamon 
1/4 tsp ground allspice 
1/4 tsp salt 
3 extra large eggs, room temperature 
1 cup granulated white sugar 
1/2 tsp pure vanilla extract 
2/3 cup pumpkin puree 

Filling: 
8 oz cream cheese, room temperature 
2 tbsp unsalted butter, room temperature 
1 cup confectioners' sugar 
1/2 tsp vanilla extract 
1/2 cup chopped walnuts or pecans 

1. Preheat oven to 375°F and grease 15 x 10 baking pan, line with 
    parchment paper, and then butter and flour the parchment paper.

2. In a large bowl, sift the flour, baking powder, baking soda, cinnamon, 
    allspice, and salt. 

3. Place the eggs with the sugar and beat on high speed until thick and 
    fluffy. Beat in the vanilla extract and pumpkin puree. Gently fold in 
    the sifted flour mixture. 

4. Pour the batter into the prepared pan, evenly spreading the cake 
    batter with an offset spatula or knife. Bake for about 13 - 15 minutes or 
    until a toothpick inserted in the center comes out clean and the cake, 
    when lightly pressed, springs back.

5. Cool the cake in the pan for 5 minutes before inverting the roll onto a 
    clean dish towel that has been sprinkled with confectioners' sugar. 
    Carefully remove the parchment paper, sprinkle lightly with 
    confectioners sugar, and roll up the pumpkin roll, with the towel. Place 
    on a wire rack to cool. 

6. While the cake is cooling, beat the cream cheese, butter, and vanilla 
    extract until light and fluffy. Add the sugar and beat until smooth. Then 
    fold in the nuts. 

 7. To assemble, unroll the cake and spread with the filling, and reroll. 
    Transfer to a serving platter and cover and chill in the refrigerator for a 
    few hours or overnight. 

Copyright 2011 LtDan'sKitchen blogs
The cake can be served immediately but chilling it for a few hours, or even overnight, sets the filling and makes it easier to slice. Just before serving, dust with confectioners sugar. 

*Joy of Baking: Pumpkin Roll recipe 

Saturday, October 29, 2011

Caesar Salad 2

Copyright 2011 LtDan'sKitchen blogs
  • This recipe of Caesar Salad is a bit more involved and has a lot more ingredients compared to the simple version I originally posted. The main reason for this second posting is really to simply get rid of a head of iceberg lettuce that I have and also to use a can of anchovies that I bought for no reason a long time ago. Not really sure why but I grabbed it and I have had it in my cupboard for some time now. 
The salad came up as something that needed to be made too since I planned to make my oven-baked chicken and a fresh cold Caesar salad is the best accompaniment to a crunchy chicken hot from the oven. The inspiration for the presentation of the salad came from the restaurant Rainforest Cafe at the Gurnee Mills mall in Illinois. My friend ordered a Caesar salad and she was handed half a head of lettuce. It looked weird yet tasty and lettuce never looked the same to me since then.  

  • Caesar Salad 2

  • 2 extra-large egg yolk at room temperature
  • 1 tsp Dijon mustard
  • 1 tsp stone ground mustard
  • 2 small cloves garlic, minced
  • 10 anchovy fillets with the oil
  • 1/3 cup freshly squeezed lemon juice 
  • Kosher salt
  • 1/2 teaspoon freshly ground black pepper
  • 1 cup good mild olive oil
  • 1/2 cup freshly grated Parmesan cheese
  • 1 head of Iceberg lettuce
1. In a bowl, mince the anchovies including the oil it came with. Add the 
    mustard, garlic, egg yolks, and lemon juice. Whisk well until mixed 
    very well.

2. Drizzle in the olive oil while whisking until thick and emulsified. Add 
    the cheese and whisk until well mixed. Season with salt and pepper. 

3. Cut the lettuce in large wedges and drizzle the dressing on top. 
    Serve right away. 

This recipe is a bit on the lemony side so if you prefer a milder creamy dressing, this is not the one for you. 

Oven-Baked Fried Chicken

Copyright 2011 LtDan'sKitchen blogs
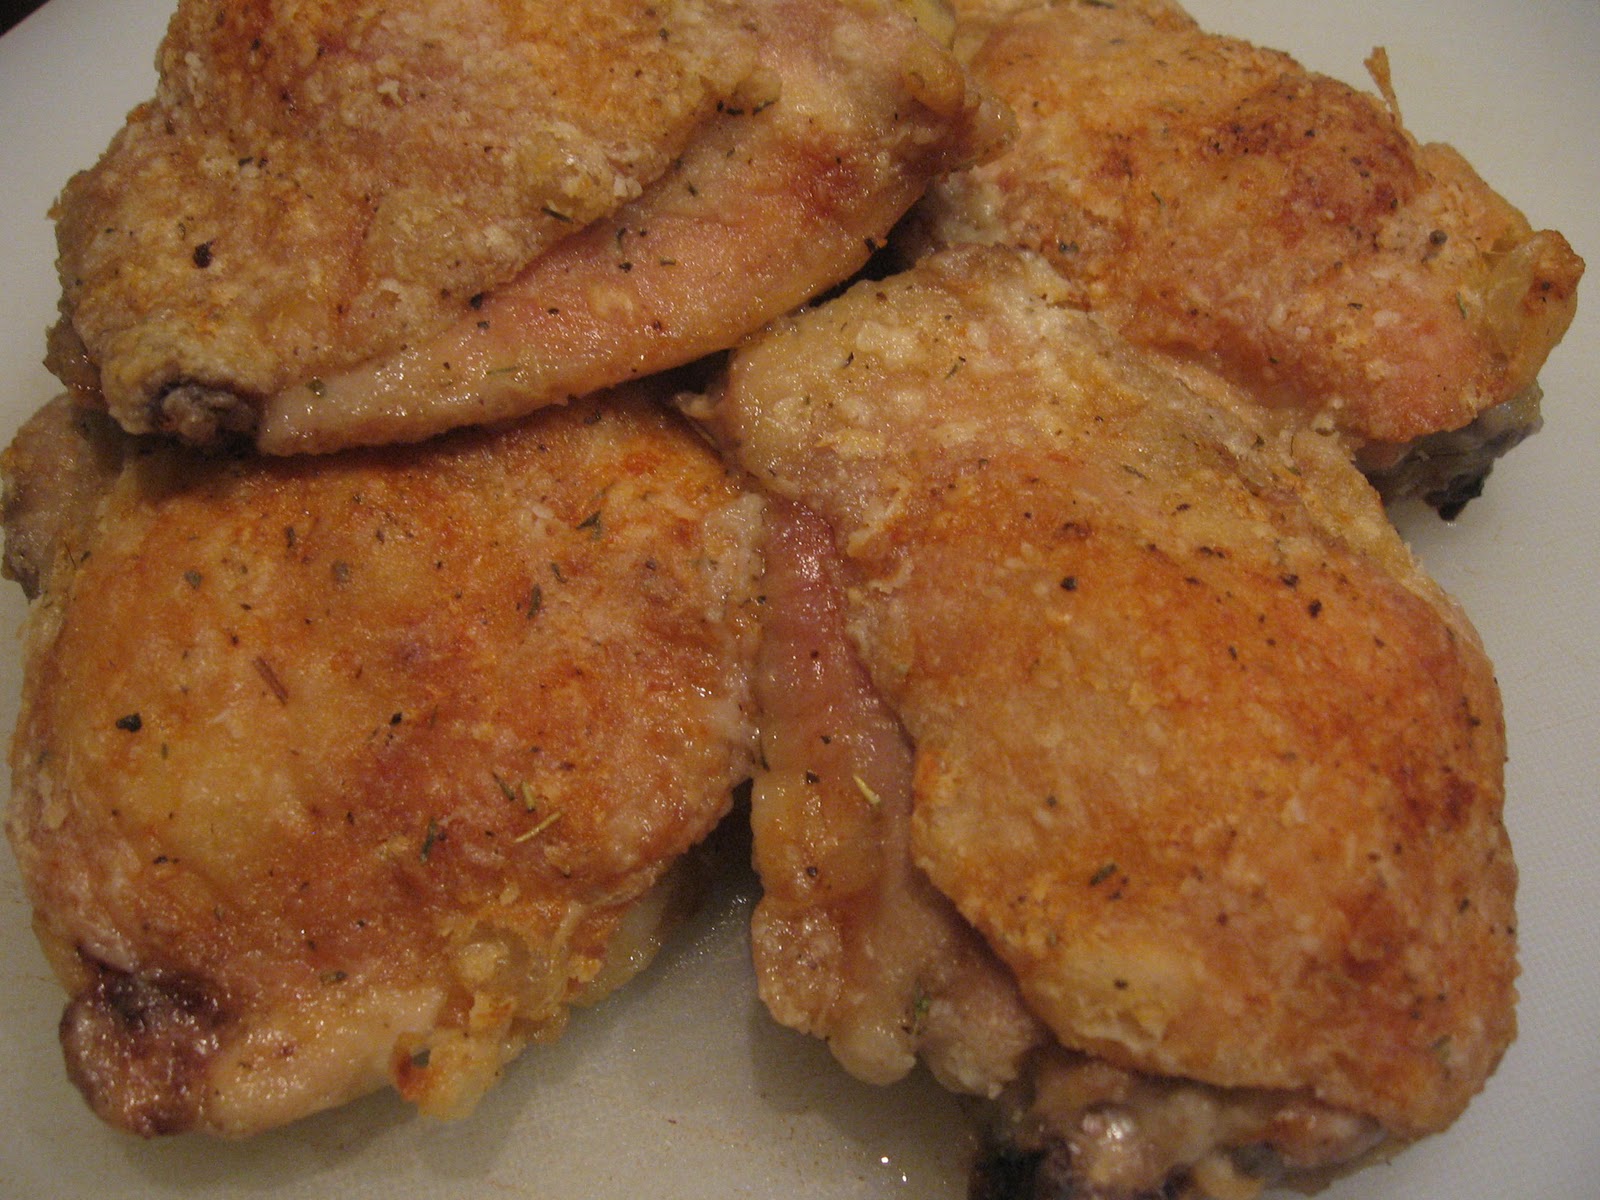
This "southern" dish is something I learned from a friend who is also a wonderful cook. She is a Filipina married to an American but I really cannot say that this dish is an Americanized version of something from back home. Rather, it is a take on southern fried chicken cooked a healthier way. However, I do prefer to use chicken thighs for this dish as having the bone in helps keep the chicken moist. You can also use white meat but I suggest you keep the breast bone in and adjust the cooking time to ensure it does not end up like a dried prune. 

My friend served this dish for Sunday lunch after mass while I was still in graduate school in Florida. It came out of the oven hot and golden brown and juicy and crunchy and just oh so good. I just loved it and I had to investigate how she made this dish and after knowing how simple it was, this is how I make fried chicken now. Over the years, I've learned to add some herbs to the coating mix to enhance its flavor although there is really no need for it. It does add a sense of je ne sais quoi to the dish and my favored choice is Herbes de Provence.

Oven-Baked Fried Chicken

Copyright 2011 LtDan'sKitchen blogs
2-3 lbs chicken thighs, 
  skin on
salt and pepper
1/3 cup flour
Herbes de Provence

1. Thaw the chicken and 
    pat dry. Season with 
    salt and pepper on 
    both sides. 

2. In a pie plate, mix the 
    flour with about 1/2tsp 
    salt and a few turns of 
    black pepper. Add 1/2 tsp Herbes de Provence and mix well. 

3. Coat the chicken pieces with the flour mix and lay flat (skin side up) on a 
    lined baking sheet. 

4. Bake the chicken on a preheated oven at 375°F for about an hour or until 
    the skin is crispy. Halfway through, baste the skin with the juices on the 
    pan. 

5. You can also sprinkle additional Herbes de Provence to the chicken pieces 
    10 minutes prior to it being done.