Recipes

Tuesday, December 31, 2013

Baked Stuffed Chicken

Copyright 2013 LtDan'sKitchen blogs
The birth of this dish came about when we were trying to put together bacon, butter, cheese and chicken into one dish. A quick search on the internet came up with a stuffed chicken recipe that was both simple as well as tasty. However, given my penchant for making any recipe a bit more personal, I tweaked the recipe once again until I came up with a winning formula. By then, the butter and cheese bits were no longer included in the recipe. This was a big hit during my Christmas lunch celebration with family and friends and for the literary folks, it has a bit of 50 shades thrown in for good measure. I should really call this dish 50 Shades of Poultry but then again, I better not.

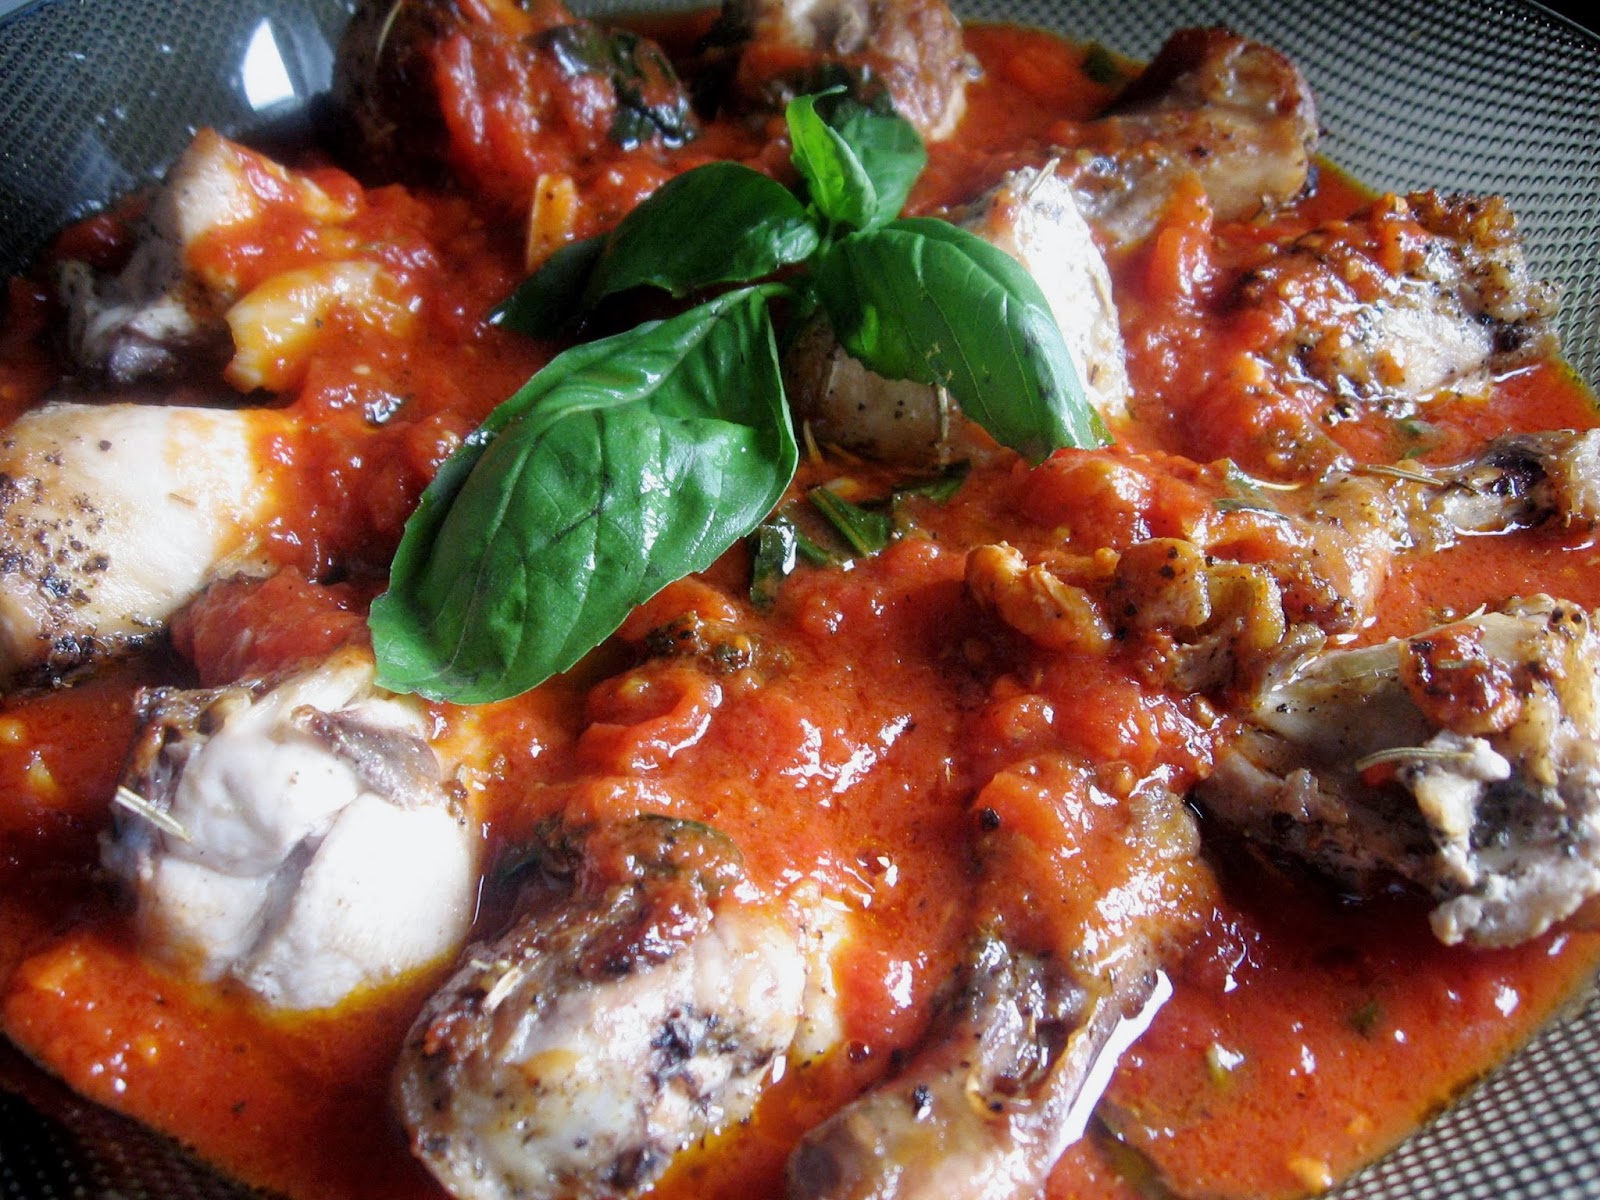
A few things to keep in mind if you plan to try this dish are: one, learn how to partially debone a chicken. By partial, I meant leaving the drumstick intact. It saves you time when baking it and two, you need to learn how to sew and tie up a chicken. No worries however, as both can be easily learned and once perfected, it will only take about 15 minutes to debone a chicken and stuff it with any filling that suits your fancy.

Baked Stuffed Chicken

2 2-lb whole chicken, deboned
1 large onion, diced
4 garlic cloves, minced
2 tbsp parsley, chopped
1 cup brown rice, cooked
1 cup bread crumbs
1/2 tsp Herbes de Provence
8 strips of bacon, diced
salt and pepper

1. In a skillet over medium high heat, brown the bacon. Once browned,
    remove to a plate and set aside. 

2. In the same skillet, saute the onions and garlic in the bacon drippings. 
    Season with salt and pepper and cook until softened. Let cool. 

3. Prepare the filling by adding the cooked rice, crisped bacon, parsley and 
    bread crumbs with the sauteed onions and garlic. Mix well. 

4. Season the inside of the chicken with salt and pepper. Stuff with half the
    filling and secure both ends of the chicken with a twine. Further secure
    the chicken with more twine to retain the shape of a whole chicken. Do 
    the same for the second bird.

5. Set both birds in a baking pan cut side down and season with more salt 
    and pepper. Drizzle enough olive oil to baste the chicken. Sprinkle the 
    Herbes de Provence and bake in a preheated oven at 375°F for about 
    an hour or until the skin is golden brown.

6. Let rest for about 5 minutes before carving. 
      

Baked Macaroni

Copyright 2013 LtDan'sKitchen blogs
Baked Macaroni, is the quintessential favorite of almost every kid in America, my nephew and nieces included. They love the boxed variety from Kraft and even though I always try to prepare them food made from scratch, they never seem to appreciate the reasons why I do it. Anyway, this dish is not for my nephew and nieces who are miles away across the globe in Illinois. This adult version of baked macaroni is for our batch Christmas party this year. It was assigned to a friend but she thought I will do a much better job at it so she relegated the cooking to me.

Truth be told, it has been some time since I made this dish and well, baked macaroni is cooked differently here in the Philippines. The sauce that they use is almost always tomato based and is flavored with either ground beef, hotdogs or sausages. Thus, I am torn between the traditional American baked macaroni dish I have come to love and the one that is commonly served here during special occasions. I ended up combining both recipes sans the meat to satisfy both my desire to stay true to the dish and to have it look a bit familiar to my Filipino friends.

Baked Macaroni

Marinara Sauce:

4 cloves garlic, minced
4 tbsp olive oil
1 30-oz canned whole tomatoes
1/8 tsp dried oregano
1/4 tsp red chili flakes
salt and pepper

Cheese Sauce:
1/2 cup salted butter
8 tbsp flour
6 cups milk
1/8 tsp nutmeg
1 cup shredded sharp cheddar
1/4 cup shredded Monterrey Jack
salt and pepper

1 1/2 lb macaroni, cooked as per packet instructions
1/2 cup shredded Mozzarella cheese
1/2 cup Panko bread crumbs
Herbes de Provence

1. To prepare the marinara sauce, heat the olive oil in a pot over medium 
    heat. Add the garlic and saute until slightly browned. Add the chili flakes 
    and saute for a minute. 

2. Crush the whole tomatoes with your hands and pour into the pot. Rinse the
    can with about a cup of water and add to the sauce. Season with salt and 
    pepper and the dried oregano. 

3. Bring the pot to a boil and lower the heat to low and simmer covered for 
    about 30 minutes.  Check for flavor and set aside. 

4. In a large skillet, melt the butter over medium low heat. Add the flour and 
    mix until a smooth paste is obtained. 

5. Slowly pour in the milk while whisking the roux (butter and flour mixture). 
    Continue to whisk until all the milk has been incorporated. This will prevent
    lumps from forming. 

6. Season with the nutmeg and continue to cook the sauce for about 5-10 
    minutes. Add more milk if it gets too thick. 

7. Add the cheddar and Monterrey Jack cheese and stir until fully incorporated
    into the sauce. Check for flavor and correct with salt and pepper. 

To assemble, mix the cooked macaroni with the cheese sauce and combine until the pasta is evenly coated. Spoon about 2 cups of the marinara sauce into a 9x13 baking dish and top with the macaroni. Sprinkle with the mozzarella cheese and bread crumbs and dust with a little bit of the Herbes the Provence. Bake in a preheated oven at 350°F for about 30 minutes or until the top is golden brown. Cool for 5 minutes before serving. 
 

Chicken ala Providence

Copyright 2013 LtDan'sKitchen blogs
This is a favorite chicken dish of ours when we were living in Florida as graduate students. It was my friend Celeste who actually loved cooking this dish. My part was always relegated to the desserts. The recipe is taken from the Women's Day cook book that we bought for 25c in a book sale. I have known of this dish but never prepared it myself and it was a surprise how much work it took to complete the dish.The dish is prepared in three steps but I decided to extend the last step and baked it a little bit longer to bring the flavors together. 

The dish uses chicken pieces that gets poached, then deboned and then browned in butter. I decided to use chicken thighs to maximize the flavor and that it tends to retain it's shape during the cooking process. The lemony sauce pulls the whole dish together and I prepared it a bit differently so it looks less yellow and more like brown gravy. Definitely a meal for Sunday lunch, it is best served with rice pilaf or a good piece of crusty bread. 

Chicken ala Providence - Adapted*

2-3 lbs chicken thighs
2 bay leaves
1 stalk of parsley + extra for garnish
4 medium-sized carrot, cubed
2 medium onions, quartered
1 tsp Herbes de Provence
4 tbsp olive oil
6-8 cups chicken broth
1 cup flour + 2 tbsp flour
2 egg yolks
1 tbsp lemon juice
6 tbsp unsalted butter
8 slices of bacon, cut into 1-inch strips and fried
2 tbsp chopped parsley

1. Poach the chicken pieces in a small pot at medium heat with enough broth
    to cover them. Add the bay leaves and bring to a boil. Simmer and cook 
    until the chicken is tender but not falling off the bones. Remove the 
    chicken pieces and save 2 cups of the broth. 

2. When the chicken is cool enough to handle, remove the skin and the bones.
    Dredge with flour and brown in a skillet over medium low heat in 4 tbsp 
    butter in batches. Add olive oil if more is needed to brown the meat. 

3. Preheat the oven to 350°F. Saute the onion and carrots in the pan 
    drippings and cook until slightly browned on the edges. Season with salt 
    and pepper and the Herbes de Provence. Remove from the heat and set 
    aside. 

4. In the same skillet, melt the remaining unsalted butter over medium heat 
    and add the 2 tablespoons of flour. Add the reserved broth and continue 
    stirring until thick and smooth. Add the lemon juice. Turn off the heat and
    whisk in the two egg yolks quickly to prevent them from being scrambled. 
    Season to taste with salt and pepper.

5. In a 9x13 baking dish, arrange the browned chicken pieces and scatter the 
    onions and carrots all around. Pour the lemon sauce over and bake for 
    about 20 minutes. 

6. To serve, garnish with the crispy bacon and the chopped parsley. 

* Eileen Tighe: Editor, Woman's Day Encyclopedia Volume 3, Fawcett Publications Inc., New York: 1966.
 

Tuesday, November 26, 2013

Chicken Asado

Copyright 2013 LtDan'sKitchen blogs
This is a chicken dish that I never really thought was remarkable enough but given the simplicity of this dish, it just might prove to be a time-saver when you have nothing but chicken in your freezer plus a few spices and seasonings that might already be in your cupboard. I was advised by my doctor to stick to fish and chicken in a bid to lower my uric acid level but since it was not getting to the point where it should be and I really do not want to take any medication, I had to give up chicken as well. This dish was then part of a plan to get rid of the chicken that I bought during my weekend grocery and to have nothing but fish in the freezer. 

Asado is a common term used in Mexican dishes while living in the US or to put it in the right context, Tex-Mex. There is also a variety of steamed meat buns that has an asado filling but is usually made with pork. It has a sweet unlike the asado of Mexican derivation which is more spicy and is chili-based. It turns out that chicken asado is more of the sour variety with nary the sweetness associated with an adobo dish which is quite similar in terms of preparation. After looking up a few recipes, I came up with a simple version that is sure to please people on the go who wants to eat something nourishing and tasty. 

Chicken Asado

2 lbs chicken cut up
4 small potatoes, peeled and quartered
4 garlic cloves, minced
1 large onion, diced
4 large Roma tomatoes, diced
1/4 cup soy sauce
2 tbsp balsamic vinegar
2 tbsp lemon juice
2 dried bay leaves
salt and pepper
4 tbsp vegetable oil
1 cup water of broth

1. Marinade the chicken in half the garlic, lemon juice, balsamic vinegar, soy 
    sauce and season with salt and pepper. Allow to sit for at least 30 minutes.

2. In a large skillet over medium high heat, saute the remaining garlic with 
    the onions in the vegetable oil. Season with salt and pepper and cook until 
    soft and fragrant. Add the bay leaves and cook for another minute. 

3. Add the marinated chicken and brown them in the skillet on all sides. Save 
   the marinade. 

4. When the chicken has browned, pour the marinade and the water or broth 
    and bring to a boil. Once boiling, add the tomatoes and cook covered for 
    about 10 minutes.

5. Remove the lid and add the potatoes. Lower the heat to medium low and 
    simmer covered until the potatoes are tender but still holds its shape. 

6. Check for flavor and adjust accordingly. Serve with steamed white rice.

If you want the dish to be a bit thicker, raise the heat back to medium high and allow the sauce to reduce. If the potatoes and chicken pieces are getting overcooked, spoon them out and reduce the sauce on its own. Make sure you check the flavor as it might be too salty so you may have to add some water. Pour the sauce over the chicken pieces and potatoes and serve immediately.

Monday, November 11, 2013

Honey Chocolate Cake with Rum

Copyright 2013 LtDan'sKitchen blogs
One time, I went to my favorite cake place to buy eclairs for my friends and I tried one of their cakes that I often ignore. It was a simple chocolate cake that was flavored with run aptly named, Very Sinful Chocolate Rum Cake. Since then, I have been plagued as to how I can recreate what I just tasted since it was so good to the very last morsel. My first attempt was when my friends were in town to attend the local festival a few weeks ago. I baked a simple chocolate cake that I infused with rum. The verdict: the cake was moist but the rum flavor was missing. Since cake number one was a bust, I needed to find another reason why I needed to bake a second chocolate cake since I'm on a regimented diet. Well, that reason came sooner than I expected. 

Copyright 2013 LtDan'sKitchen blogs
My second attempt on a Rum Cake came a few weeks later during the November 1st celebration. Armed with a new recipe, I was determined to use more rum to make the cake every bit as rummy as it is yummy. The recipe I used is a honey chocolate cake, the link to the recipe I already posted on the facebook page of my blog. I also decided to use a sugar syrup infused with rum to soak the cake but I ended up ditching the syrup as I feared the cake might end up too sweet. This is one mistake that I regret now. My one other regret is that I used the accompanying recipe for the ganache when my instincts told me to use my old recipe.  The cake came out great but there was one thing that still eluded me, the rummy moistness. I think my version of the cake came quite close but using the sugar syrup flavored with rum would have imparted the even flavor of the rum which is what I was looking for. Despite the fact that the ganache recipe I followed was good, it did not set as beautifully as my old ganache recipe. Anyway, the third time might prove to be my charm, whenever that will be. 

Honey Chocolate Cake with Rum - Adapted*

1 cup cocoa powder
1 1/2 cup hot strong brewed coffee
1 cup honey
3 cups flour, sifted
1 1/2 tsp baking powder
1 1/2 tsp baking soda
1 tsp salt
3/4 cup unsalted butter + extra
3/4 cup vegetable oil
1 cup packed brown sugar
1 cup white sugar
4 large eggs
3/4 cup yogurt
2 tsp vanilla extract
1/4 cup rum

Chocolate Ganache with Honey:
16 oz bittersweet chocolate, chopped
2 cups heavy cream
1/4 cup honey
2 oz  unsalted butter
3 tbsp rum
1 tsp vanilla extract

1. Line the 2 9-inch round baking pans and grease with the extra unsalted 
    butter. Set aside. Preheat the oven to 350°F.

2. Sift the cocoa powder in a small bowl and whisk in the hot coffee. Add 
    the honey and mix well. Set aside and let cool completely.

3. In another bowl, sift the flour, baking powder and soda and the salt. Set 
    aside. 

4. In a metal bowl, beat the butter at medium speed while gradually adding 
    the oil. Add the brown and white sugar and increase the speed to high. 
    Beat until light and fluffy. 

5. Add the eggs one at a time beating well after each addition. Add the 
    yogurt and vanilla extract and beat until just incorporated. 

6. With the mixer on low, alternately add the flour mixture in three additions
    with the cocoa mixture in two additions. Beat until just combined. 

7. Divide the cake batter into the two pans and bake for 40 to 50 minutes or 
    until a toothpick inserted comes out clean. 

8. Allow the cakes to cool in the pan for 10 to 15 minutes. Run a knife on the
    sides and invert the cake. Remove the parchment and let cool completely. 

9. Prepare the ganache. Combine the cream and the honey and at low heat, 
    bring to a simmer. Remove from heat and add the chocolate. Allow to 
    stand for a minute and whisk until melted. 

10. Add the butter and allow to melt. Whisk in the rum and continue to mix 
     until smooth. Cover with a clingfilm and allow to cool until the ganache 
     is almost set but still spreadable. This can take half a day to 24 hours.

11. To assemble the cake, brush the rum on the cake layers and spread about
      a third of the ganache on one of the cake layers. Top with the second 
      cake layer. Spread a thin layer of the ganache to cover the whole cake.
      Cool in the fridge for about an hour to set the crumb coat. Cover the 
      cake with the rest of the ganache.

The cake can be made a day ahead and stored at room temperature covered with clingfilm. The ganache can also be made a day ahead. The cake tastes better a day or two after assembly. You can serve the cake at room temperature but I prefer it served cold.

*Recipe from Fine Cooking by Jill O'Connor, Issue 119.
            

Thursday, November 7, 2013

Marinated and Seared Chicken with Tomatoes and Basil

Copyright 2013 LtDan'sKitchen blogs
Looking for a healthy recipe to accompany my baked flounder on the family's November 1st celebration, I decided to use one of Lidia's recipe. The original recipe actually used chicken breasts of which I am not a big fan of, so I decided to use regular chicken pieces and change the recipe just a tiny bit. The result was really good and even though I only tasted a small portion of it, this dish to me says nothing else but, ITALY!

Just in case you are wondering what is the relevance of November 1st, well, it is the time of the year when we remember our family members who have died. Although All Soul's Day falls on November 2nd, for some strange reason, Filipinos celebrate this special day a day early. We also usually prepare a lot of dishes cooked in coconut oil but since my Mom is no longer around, it is me or my cousin who does the most work during family occasions. We both decided to go simple so I made the main dishes (and I went the Italian route) while she made the native dishes that uses either coconut milk or just plain grated coconut meat. This recipe is indeed a strange departure from the usual dishes prepared on this special day but it surely made our lives a lot more easygoing that day.

Marinated and Seared Chicken with Tomatoes and Basil - Adapted*

2 lbs chicken pieces
4 garlic cloves, crushed
1 tsp dried rosemary
1 tsp dried sage
1/2 cup olive oil
1 tsp salt
1/4 tsp pepper

Sauce:
1 28-oz whole tomatoes, canned
8 garlic cloves, sliced
1/8 tsp red chili flakes
salt
1/2 cup basil leaves, julienned

1. In a large bowl, combine the chicken with the garlic, dried herbs, half the 
    olive oil and season with salt and pepper. Cover with a clingfilm and store 
    in the fridge overnight. 

2.  In a deep skillet over medium heat, add the remaining olive oil and once 
     heated, fry the chicken pieces in small batches until browned and cooked 
     through. Set aside. 

3. In the same skillet, add the garlic into the drippings and saute until golden 
    brown. Add the chili flakes and saute for a minute. 

4.  Pour the tomatoes into a bowl and crush them with your hands. Wash off 
     the can with a cup of water and add to the bowl of crushed tomatoes. 
     Add into the skillet and bring to a boil.

5. Once boiling, decrease the heat to low and allow to simmer covered for 10 
    minutes. 

6. Check the sauce for flavor and season with salt. Add the basil leaves and 
    stir. Cook for another minute. 

7. To serve, ladle about half the sauce in a serving platter. Arrange the 
    chicken pieces and sppon the rest of the sauce on top of the chicken. 
    Garnish with a sprig of basil.

*Lidia's Italy: Seared Marinated Chicken with Tomatoes and Basil.
 

Buttered Fried Chicken

Copyright 2013 LtDan'sKitchen blogs
This one is definitely in the books for any cardiologist as a definite NO when asked if fried chicken is okay. To top it off, this version was deep fried in butter. Yep, pure, unadulterated unsalted butter. Hey, at least it is unsalted. 

Anyway, the "restaurants" or eateries in the municipality of Miagao offer what they call buttered fried chicken which has become a favorite whenever we eat out. They offer three versions I believe. There is the garlic fried chicken, the regular and then the buttered kind which is our favorite. Well, my favorite anyway.

On a dare, we decided to make this for dinner. This was actually paired with the Chicken Skin barbecue and a side of Mung Bean Stew. So technically, all three were off limits to me. I ended up eating a piece of the buttered chicken and a stick of the barbecue for dinner that night. Hey, the cook has got to eat!

Buttered Chicken

2 lbs chicken pieces
salt and pepper
2 sticks unsalted butter (1 cup)

Seasoned Flour:
1 cup all purpose flour
1 tsp salt
1/4 tsp pepper

Seasoned Bread Crumbs:
2 cups panko bread crumbs
1/2 tsp salt
1/4 tsp Spanish paprika
1/8 tsp cayenne pepper
1/4 tsp dried thyme

Egg Wash:
2 large eggs beaten with
2 tbsp water

1. Season the chicken pieces with salt and pepper. Let sit for about 5 
    minutes. 

2. Melt the butter in a deep skillet over medium low heat. While butter is 
    melting, dredge the chicken pieces in the flour mixture. Tap off the 
    excess flour. Do this individually or in small batches. 

3. When the butter has melted and ready for frying, dip the dredged 
    chicken pieces in the egg wash and then roll in the bread crumb mixture. 
 
4. Drop the breaded chicken in the butter and fry about 4 to 5 pieces at a 
    time. Increase the heat to medium and fry until golden brown on both 
    sides. Drain on brown paper bags or paper towels. 

5. Fry the rest of the chicken pieces in small batches. 

Baked Flounder

Copyright 2013 LtDan'sKitchen blogs
I was going through the fish aisle in the grocery store when I spotted this rather flat looking fish which after asking the fishmonger was what I thought it was, a flounder. I  asked my Dad if he wanted to try it and he said , "No!" My Dad has a thing for the bigger species of fish, he prefers them small. 

The following day however, I spotted the same fish in the other grocery store that I frequent and right there and then, I bought two of them to cook for the November 1st celebration instead of the usual pork or meat dishes that we serve. The question now is, how to cook it. Flounder are sold fileted in the grocery stores back in the US. I have the real deal so I need to find a good way to cook it other than to fry it which was a suggestion by the fishmonger. 

After browsing through the internet, I found a simple recipe that lends an Italian flair to the dish. Baked in nothing more than olive oil, tomatoes and a few herbs and spices, I knew I found my recipe. 

Baked Flounder - Adapted*

2 lbs flounder, gutted and descaled
1 lb cherry tomatoes, halved
8 garlic cloves, crushed
2 tbsp basil leaves, julienned
juice of one lemon
1/4 tsp Herbes de Provence
salt and pepper
olive oil

1. Preheat the oven to 375°F. In a bowl, combine the tomatoes, garlic, basil
    leaves, Herbes de Provence and lemon juice. Season with salt and pepper. 
    Drizzle in about 2 tbsp of olive oil and transfer to a lined baking sheet.

2.  Bake the tomatoes in the oven for about 5 minutes. Meanwhile, season 
     the fish with salt and pepper on both sides.

3. Lay the fish on top of the pre-baked tomatoes and drizzle with more olive 
    oil. Return into the oven and bake for another 25 to 30 minutes.  Check if 
    the fish is cooked through. Otherwise, bake for another 5 to 10 minutes.

4. To serve, transfer the fish into a large serving platter and spoon the 
    tomatoes and the sauce on top. Garnish with a drizzling of more olive oil 
    and more julienned basil leaves. 

*Bon Appetit: Baked Flounder with Tomatoes and Basil.
 

Friday, October 25, 2013

Hunter's-Style Chicken with Rosemary

Copyright 2013 LtDan'sKitchen blogs
There is nothing more delightful than a simple dish cooked in a very straightforward manner using really good ingredients. What comes off it is nothing short of amazing. Take this dish for instance. It is basically made up of 4 ingredients: chicken, rosemary, garlic and diced tomatoes. The steps required to complete the dish is very basic and even if you are a most likely candidate for the show Worst Cooks in America, you might just ace this one. 

Straight off from Lidia's website, There was nothing to modify other than to add a simple garnish of basil leaves. I was indulging myself since a friend gave me fresh basil leaves from an organic garden and they smelled heavenly. It was just begging to be used in a culinary way. 

Hunter's-Style Chicken with Rosemary - Adapted*

2-3 lbs chicken cut up
1/3 cup olive oil
3 cup diced tomatoes, canned
1 tsp rosemary, dried
8 garlic cloves, peeled and sliced thinly
salt and pepper

1. Season the chicken pieces with salt and pepper. Set aside.

2. In a deep skillet over medium heat, brown the chicken in the olive oil. Do 
    this in batches if necessary. 

3. Once the chicken pieces are browned, add the garlic and the rosemary 
    into the oil and saute until the garlic has turned golden brown. 

4. Pour the diced tomatoes and add about a cup of water to loosen the 
    sauce.

5. Bring to a boil and once boiling, cover the skillet and decrease the heat to 
    medium low. Simmer for about 30 minutes. 

6. Check for flavor and adjust accordingly. The dish is ready when the sauce 
    is fairly think but still loose. 

*Lidia's Italy: Pollo alla Cacciatora recipe.   

Thursday, October 17, 2013

Beef Stewed in Beer with Caramelized Onions

Copyright 2013 LtDan'sKitchen blogs
This is a dish that I tried because it is something I cannot eat. Due to my uric acid problems, I had to sacrifice by not eating a beef dish that looked so appetizing during a meeting I attended about a week ago. I had to settle for a piece of fried chicken while my friends gorged on this beautiful beef dish topped with caramelized onions. My guess was that it was "bistek", or what is the Filipino version of beef steak. 

The term bistek is really a misnomer I think considering that this dish is referred to as our local answer to the American favorite, the steak. For one, the meat is usually marinated in soy sauce and calmondin and the only seasoning for a good steak if you ask a purist is simple salt and maybe a dash of pepper. Two, the meat is sliced very thinly so that it will take only a couple of minutes to cook without the meat becoming rubbery while a good steak is about at least an inch thick. Lastly, it is usually served with caramelized onions as a garnish while a good steak needs no condiments on the side. 

Anyway, back to our dish. With just my instinct and my imagination of what the dish might taste like, I decided to prepare something that resembled the beef dish I was deprived of using a recipe that combined stewing beef in beer and the traditional flavors for bistek. What I created was indeed a version that was surely delectable to look at and after a taste test, my friend informed me that my dish was very similar in taste to what was served in the meeting. That was indeed good enough for me.

Beef Stewed in Beer with Caramelized Onions

3-4 lbs of beef, unsliced
1/3 cup calmondin juice or lemon juice
1/4 cup soy sauce
2 tbsp Worcestershire sauce
2 tbsp honey
1/4 tsp black pepper
1 tsp salt
8 cloves of garlic, minced
2 bottles of lager
6 bay leaves
1 1/2 ponds of Spanish onions, sliced
2 tbsp unsalted butter
6 tbsp vegetable oil

1. Marinate the beef in half the garlic, 3 bay leaves, soy sauce, honey, 
    Worcestershire sauce, calmondin juice and season with salt and 
    pepper. Cover and store in the fridge for at least two hours. 

2. In a large pot, heat half the oil and saute half the garlic and the 3 bay 
    leaves over medium high heat. Season with salt and pepper. Once the 
    garlic has softened, brown the meat in the pot on all sides.

3. Once the meat is browned, add the beer and the marinade into the pot. 
    Make sure that the meat is totally submerged and add more water if 
    needed. Bring to a boil.

4. Once boiling, adjust the heat to low and cook covered until the meat is 
    tender. This will take about 2 hours. Check occasionally to make sure that 
    it has not dried out. 

5. When the meat is tender, check for flavor and adjust with salt and 
    pepper. Add the unsalted butter and allow to melt into the sauce.

6. In a large skillet, heat the remaining vegetable oil over medium high heat. 
    Saute the onions until softened. Season with salt and keep cooking until it 
    has turned golden and is very soft. Set aside.

7. To serve, slice the beef into thin rounds and top with the caramelized 
    onions. Drizzle the sauce over the beef slices and serve with some extra 
    sauce on the side.    
  

Chicken Skin Barbecue

Copyright 2013 LtDan'sKitchen blogs
Chicken Skiiiiiinnnn. The HORRORS!!!!! Whatever! Love this dish even though in reality, I can only eat one small stick. The flavors are delish and you will never realize that you are eating chicken skin unless I told you what they are. I seldom use the term delish but in this case, it is very appropriate. The dish is definitely an acquired taste. Being Asian, chicken skin is equated to flavor in the same manner that we think of the fattiest cut of pork as being the best tasting of the lot. What the heck, you only live once unless you are James Bond. 

After searching for a recipe, I found one that was not only amazing but was also a good read. Anyway, as is the case with me, I changed it up a bit and the end result was definitely a dish you will want to try over and over and over again. Save those skins, people!

Chicken Skin Barbecue

100g chicken skins, sliced into strips
6-8 skewers

Marinade:
juice of 2 calamondin or half a lemon
1 tbsp brown sugar
2 tbsp tomato ketchup
1/4 tsp black pepper
1/4 tsp red pepper flakes
1 tsp salt
1/2 inch ginger, diced
4 garlic cloves, crushed
1/2 small onion, diced
2 bay leaves

For the finishing glaze:
1 tsp annatto seeds 
2 tbsp melted butter

1.  Mix the ingredients for the marinade in a small bowl and add the chicken 
    skins. Marinate for at least an hour in the fridge. Meanwhile, soak the 
    bamboo skewers in water.

2. Steep the annatto seeds in the melted butter over low heat until it turns 
    red. Set aside. 
 
3.When ready to grill, thread the skins halfway into the skewers. Do not 
   thread too much skin on one stick to ensure they cook properly. 

4. Over a low burning coal, grill the skins making sure you kill the fire when 
    the fat starts to burn or just be quick to pull them out. 

5. When the skins are lightly browned, brush with the steeped butter on all 
    sides and return to the grill and cook until slightly charred. 

6. Serve immediately. Perfect paired with cold beer as an appetizer.  

Sunday, October 6, 2013

Very Simple Roasted Chicken - Filipino style

Copyright 2013 LtDan'sKitchen blogs
Okay, This recipe was created out of necessity and just because I wanted a roast chicken but did not want to buy it from one of the many stalls that sell roasted chicken dotting the city. I used to roast meat a lot from chicken to pork and even turkey but I seldom do that here since I came home last year. It might be due to the fact that a tank of gas for cooking is a bit expensive or that my oven is not the best oven in the world and setting it to the right temperature is a pain. Either way, I'm starting to roast meat again albeit not very often. 

This roast chicken is very simple in that I want it again to be the most basic it can be without sacrificing the flavor. I think I managed to achieve that and with the gravy that went with it, it was one delicious and simple dish that any novice can pull off. Just try and make sure that you have a meat thermometer to ensure that the bird is cooked properly. 

Roast Chicken - Filipino Style. 

2 lb young chicken
2 small carrots, quartered
2 celery stalk
1 small bundle of lemongrass
2 tbsp butter
4 garlic cloves, crushed
salt and pepper
4 tbsp vegetable oil

1. Preheat the oven to about 375°F. Prepare a 9x13 baking pan by lining with
    foil and arranging the carrots, celery and garlic cloves for the chicken to 
    rest on. Set aside.

2. Season the cavity of the bird with salt and pepper and stuff with the butter
    and the lemongrass. Secure the legs of the bird and season with more salt 
    and pepper. 

3. Arrange the bird on top of the vegetables and drizzle it with the oil. Bake 
    in the oven for about 2 hours or until the skin has turned a golden brown 
    and the meat thermometer registers 180°F.

4. Let the bird rest for 10 minutes before carving. Serve with the carrots and
    the garlic cloves.

5. To make the gravy, collect the drippings in a small potand over medium 
    heat, thicken with about 2 tbsp of flour. Once it starts to thicken, add a 
    tablespoon of butter and continue to cook until the butter has melted. 
    Check for seasoning and correct accordingly. If too salty, thin out with a 
    little bit of water. 

Balbacua Cebu via Bacolod

Copyright 2013 LtDan'sKitchen blogs
This is a doctor's nightmare come to life in a bowl but definitely a gastronomic delight. Considered a street food in Cebu, this dish is definitely very unique in the same manner that Kansi is unique to Bacolod or the KBL to the Visayan region. A testament to living in Asia where every bit of animal part is used to maximize the use of a domesticated animal, this dish uses ox cheeks, feet and tail. If you are from the West, you might think it very unappetizing and indeed, as Andrew Zimmern would refer to such fare, bizarre.  However, with an open mind, you might just learn to love this dish.

I normally don't use these animal parts because I never learned how to cook them properly. It was just upon the urging of a good friend that I decided to give it a try. My first introduction to the dish was months ago in a small eatery outside the hotel we were staying at during a conference. For the meager and almost dilapidated look of the place, I was surprised and thought that they had the best omelet, hands down. I ordered those bad boys for breakfast every morning with no fail. It was during one of our visit however, that I came upon this dish. My friend who hails from Cebu ordered the dish and with me having gout issues, I watched in awe and a bit of concern for him at the same time as he ate the dish with such gusto. I was also left wondering as to how he can enjoy such fare when all I see is cholesterol in stew form. I decided I wanted to give it a try the next day but unfortunately, they did not have it and we were scheduled to go home the next day so I never learned how it tasted. Thus, it was left in the back burner until it kept popping into my head a number of times. My final inducement was from the said friend who finally told me to make it and so I did using this recipe as my starting point. Do read the blog post if you have the time for it is quite hilarious.

Balbacua Cebu via Bacolod

8 lbs ox tail, cheeks or feet, cut into serving pieces
6 star anise
2 onions, diced
4 garlic cloves, minced
6 bay leaves
1/2 cup dried white beans, soaked overnight
1 /4 cup salted black beans, drained
1 inch ginger, peeled and sliced thinly
1 small bundle of lemon grass stalk
1/2 tsp red pepper flakes
1 picante chile
10 cups beef broth
salt and pepper
4 tbsp vegetable oil
9 saba half-ripe bananas, peeled and halved
1/3 cup green onions, diced

1. In a large pot over medium high heat, boil the meat with the bay leaves 
    and half the onions. Season with salt and pepper. Continue to boil for 
    another 20 minutes. Discard the liquid and rinse the meat thoroughly. 

2. In another large pot over medium high heat, saute the garlic with the 
    remaining onions in the vegetable oil until slightly browned and season 
    with salt and pepper. Add the ginger, star anise, red pepper flakes and 
    the lemon grass and saute for another minute. 

3. Add the soaked white beans and black beans and mix until seasoned. Pour
    in the broth together with the meat and bring to a boil. 

4. Once boiling, adjust the heat to medium low and simmer covered. This 
    will be the longest part of the cooking process. Simmer for about 5-6 
    hours or until the meat is very soft and is almost falling apart. Add more 
    water if necessary making sure you have enough broth covering the 
    simmering meat. 

5. Add the bananas and the picante pepper when the meat is almost ready 
    and cook until the bananas are soft and yet still hold their shape. Check 
    for seasoning and adjust accordingly. Serve with a sprinkling of the green 
    onions. 
 

Almond Jelly with Lychees

Copyright 2013 LtDan'sKitchen blogs
This also took about 15 years in the making. We served this dessert about 15 years ago at a function we catered and it was a hit. We almost ran out but we managed to serve enough to the guests who were invited to the party. That was our first catering job and definitely our last. I vividly remember cooking in the middle of my friend's rental place at 4am in the morning since the function was at 10am. After the event, we decided right there and then that never again will we cater. So now, that was one dream job tossed down the drain. 


Copyright 2013 LtDan'sKitchen blogs
Fast forward to now, I decided to make this dessert for today's event which was my Dad's birthday party. A belated party might I add. We were supposed to go out for lunch but after trying to find food I can eat at the mall yesterday that will fit with my new restricted diet, I decided to cook instead. For the dessert, all we needed was somebody to go up the coconut tree and grab the young ones and the rest were relatively easy to find in any grocery stores here. The jelly mix I use is Indian I believe but they came up with a jasmine flavored one lately so make sure you choose the almond kind. I have yet to try the jasmine variety. 

Almond Jelly with Lychees

3 20-oz canned lychees, syrup reserved
2 4.55-oz pack almond jelly
1 cup milk
4 cups young coconut meat
3 cup heavy cream
1 1/2 cup white kaong* (optional)
water

1. Drain the lychees and use the liquid to prepare the almond jelly. Measure 
    the lychee syrup and adjust with the milk and water to make up to 6 cups 
    of liquid. 

2. In a pot over medium heat, boil the milk and lychee syrup and slowly add 
    the almond jelly mix. Once dissolved, bring to a boil once and pour the 
    contents into a large shallow pan. Cool and refrigerate. 

3. Once the almond jelly is cool, slice into small cubes and mix with the rest 
    of the ingredients. Store in the fridge until ready to serve. 

* If using kaong, drain the kaong and wash thoroughly with water before adding to the dessert. It is usually stored in a very thick syrup and the flavor is quite overwhelming unless washed and drained thoroughly.