Recipes

Monday, August 29, 2011

Sacher Torte

Copyright 2011 LtDan'sKitchen blogs
Sachertorte, is the signature cake from Vienna, Austria. There are a lot of versions of the torte but the original recipe has never been made public and is a national trade secret to Austrians. The available recipes for the cake are mere approximations of the real thing and so you have to be careful that you find a good recipe to try out. I have two versions of the recipe and I just found the version that Lidia used on her show.  However, I am sticking to the recipe that I know works and will be using the recipe from my Chocolate Ecstasy cookbook. 

After looking at pictures of the actual cake, I decided to make a little bit of change to the assembly of the cake. There are differing number of layers to the cake. I've seen one with just one layer and another with the cake sliced in half and filled with the apricot glaze. I've also been reading a couple of blogs about the authentic Sachertorte and the reviews run the gamut from being very simple yet expensive to kind of dry and quite ordinary. To counter the dry comments, I made sure that the glaze did soak the cake to ensure maximum moistness. I also added an extra layer of chocolate ganache since the way they described the chocolate glaze was that is was quite sugary and has a brittle texture. The addition of an extra layer of chocolate ganache afforded me enough extra chocolate frosting to pipe rosettes to achieve a clean look to the cake. 

*Sachertorte - Adapted

Copyright 2011 LtDan'sKitchen blogs
Cake:
8 oz bittersweet chocolate
3/4 cup unsalted butter,   softened
1/2 cup supefine sugar
8 eggs, separated
1 cup flour

Glaze: 
1 cup apricot jam
1 tbsp lemon juice

Chocolate Glaze:
8 oz bittersweet chocolate
scant 1 cup superfine sugar
1 tbsp corn syrup
1 cup heavy cream
1 tsp vanilla extract

Chocolate Ganache:
1 cup heavy cream
8 oz bittersweet chocolate
1 tsp vanilla extract

1. Preheat oven to 350°F. Grease a 9-inch springform pan and line it with 
    wax paper. 

2. Melt the chocolate in a metal bowl over hot water. Set aside. 

3. Cream the butter with the sugar until pale and fluffy for about 3 minutes. 
    Add the egg yolks one at a time, mixing well after each addition. Beat in 
    the melted chocolate. In a second bowl with clean beaters, beat the egg 
    whites until stiff. 

4.  Fold in the sifted flour alternately with the egg whites. Place batter in 
     prepared pan and bake for 50-55 minutes. Cool on a wire rack. 

5. To make the glaze, heat the jam with the lemon juice and once warm, 
    pass the mixture through a sieve. Set aside. 

6. Once the cake has cooled, slice the cake in half and spread both layers 
    with the apricot glaze on the cut side. Set aside and prepare the 
    chocolate glaze. 

7. Combine the ingredients for the chocolate glaze in a pot and heat gently 
    with stirring until the mixture is thick and smooth. Pour a third of the 
    chocolate glaze on top of the lower layer and allow to cool and set in the 
    fridge. Leave the rest of the glaze at room temperature. 

8. Once the chocolate glaze has set on the lower cake layer, cap with the top 
    layer, the apricot-glazed side facing the chocolate glaze layer. Spread the 
    rest of the apricot glaze on the sides and top of the cake. Cool in the 
    fridge for about 15 minutes.  

9. Put the cake on a cooling rack set on top of a baking sheet and pour the 
    rest of the glaze over the cake. Return the cake into the fridge until the 
    glaze sets. Let the glaze set for at least 4 hours. 

10. To make the chocolate ganache, heat the cream over low heat. Pour 
    the cream over the chocolate and mix until smooth and satiny. Add the 
    vanilla. Let the glaze cool to room temperature and when it starts to 
    thicken, pour the glaze over the cake and let it set in the fridge for at 
    least an hour. 

11. Transfer the cake to a serving platter and you can scoop out the glaze 
    that dripped on the baking pan and pipe rosettes on the edge of the cake. 
    Serve with whipped cream. 

* France, C.; Chocolate Ecstasy; Annes Publishing Limited: London, 1996 

Pancit Molo

Copyright 2011 LtDan'sKitchen blogs
The name of this soup is a bit of a misnomer since pancit in the local language means noodles. Hence, the dilemma since there is no noodle in this soup but instead, a wrap that resembles ravioli pasta. This soup is however aptly named after the city where it first originated, Molo, in the province of Iloilo, the home province of both my Mom and Dad. There are variations to making this soup but I've learned from the best molo maker in the family, my Nanay Mercy. The recipe is fairly simple and the flavor actually depends more on the broth and not what comprises the soup which is ground meat wrapped in the thin pasta-like wrap. Most grocery stores carry the Nasoya wonton wrappers and those work perfectly for this soup. Asian stores do carry dumpling wrappers which are a bit thinner and I prefer those whenever I can get hold of them. 

The secret according to my Nanay is a good broth. Thus, I make my own broth from scratch using soup bones available in the grocery stores. If you can find one with the marrow still in it, the better, as they make the best broth. Go for beef or pork soup bones. Chicken will do but it won't be as intense as the other two. To make the broth, just saute a few cloves of garlic (minced) and a diced medium-sized onion in a little bit of olive oil and once browned, add the soup bones and add lots of water. Season well with salt and pepper. Depending on how patient you are, a good simmer for about an hour or so will yield a rich broth. If pressed for time, canned or bottled broth is perfectly fine with me. 

Pancit Molo

Wrap: 
1 packet Nasoya wrapper or dumpling wrapper 

Filling:
1 lb ground pork
1/4 cup green onions, finely minced
3-4 cloves garlic, minced
1/2 tsp soy sauce
salt and pepper

Copyright 2011 LtDan'sKitchen blogs
Mix all the filling ingredients and check for flavor by taking a tsp of the mix and poaching it in hot water until the meat loses its pink color. Once the flavor has been corrected, it is time to stuff the wrap with the filling. There is a specific way to prepare the filling where it resembles tortellini but the more crucial thing to remember, is to be a bit more conservative on the amount of filling used. About half a teaspoon of filling per wrap is about right and I say that no matter how you wrap it as long as you secure it well, that is good enough for me. The idea is to make sure that it does not fall apart in the simmering broth. Water is usually used to bind the wrap by wetting the edges but a beaten egg yolk will also work. 

Now, traditionally, you check the broth for flavor and you basically dunk the dumplings into the broth, soup bones and all. It does not take them too long to cook so you have to do this just when you are ready to serve the soup. Otherwise, the wrappers will absorb most of the broth and you end up with an engorged dumpling which in itself is still good eats. If you are going after presentation though, strain the broth in a sieve and bring back to a simmer. Add the dumplings to cook just before serving the soup. To serve, a simple garnish of chopped green onions and a drizzle of sesame oil is all you need. You will need about 10 cups of broth for the given amount of filling. You may also end up with extra filling which you can either add unwrapped into the soup or freeze for future use. 

TimTam Slam

Copyright 2011 LtDan'sKitchen blogs
Tim Tams are biscuits from Australia and gained prominence here in the US via the TimTam slam (or explosion). The first time I learned of the slam was by watching "The Graham Norton Show" while he had Natalie Imbruglia as his guest. Natalie being from Australia explained to Graham the orgasmic delights of the slam. To achieve this state, you will need a hot cup of coffee or tea with your bag of Tim Tam and you are set to go. It is best if I just let Natalie explain the details of the slam but I'm telling you, it is quite delicious and addictive. Tim Tams retail for about $4 here in the US so I try not to indulge in this delight for reasons that involve a tight budget on food and a regulated intake of sweet goods. 

I bought myself a pack of Tim Tams this weekend to vent off my frustration while looking for annatto seeds. I needed the seeds to make the peanut sauce for the stew I was cooking but for some reason, the stores were all out of it. I had about a tablespoon in my cupboard which was way less than I needed. Thus, being both pissed at this inconvenience and the fact that I was at the World Market store, I decided to vent by indulging in a pack of Tim Tams. I haven't done the slam yet but that will be happening very soon.

Baked Tilapia

Copyright 2011 LtDan'skitchen blogs
Grilling fish is a very common way to cook fish back home. My Mom would either buy fish at the market or buy it from street vendors who walk around the community selling fresh fish early in the morning. I used to hate grilled fish  but as I grew older, I came to realize that the flavors are actually more pronounced when the fish is cooked simply. With just a bit of salt on the fish, that was all that was needed to season a fresh fish. 

Living in the US, finding fish from the sea is quite difficult if not expensive. The most affordable for me is tilapia which is a pond fish grown back home in fisheries close to the beach. The kind they sell here are on the larger scale compared to what I was used to so the usual way we cook them back home is not the ideal way to go. However, I found that baking them in a pouch of foil enhances the flavor of the fish and is I think the best way to go about cooking this fish. 

Baked Tilapia

Tilipia, cleaned and scaled
tomatoes, diced
onion, diced
salt and pepper
olive oil

1. Slice the fish on a diagonal on both sides without cutting through. Set 
    aside. Prepare equal amounts of tomato and onion and stuff the cavity 
    of the fish. 

2. Season with salt and pepper and place seasoned fish on a sheet of foil. 
    Drizzle olive oil over the fish and seal. 

3. Bake at 350°F for an hour. Serve while still in the foil. 

Saturday, August 27, 2011

Spaghetti with a Zing

Copyright 2011 LtDan'sKitchen blogs
Now, this dish was inspired by Lidia as I saw in her television show in the Basilicata episode of Lidia's Italy. With no recipe available online but with the basics laid out on her show, I figured I'd give it a try and give it my usual twist. I'm using the term "zing", not just as a catchy descriptive name for the dish. It really is zingy in the sense that the sauce is prepared with red chili powder. It is a very simple dish and dressed simply with cheese and parsley. Just a word of caution, use chili powder made from dried chili peppers and not the chili powder blend used to make chili con karne which contains other additional spices. As Lidia said in her show after tasting the dish, "Fire!" I did wuss out and used a mild variety of red chili powder! 

Spaghetti with a Zing

1 lb spaghetti
1/4 cup garlic, sliced
1 1/2 tsp California red chili powder
1/2 cup grated Pecorino Romano cheese
1/4 cup chopped parsley
1/4 cup olive oil

1. Cook the spaghetti noodles as per packet instructions. 

2. Once the pasta is in the pot, heat the olive oil in a deep saute pan over 
    medium heat. Add the garlic and cook until slightly browned. 
   
3. Lower the heat and add the red chili powder and cook for one minute. 

4. Add two cups of pasta water to the pepper mix and increase the heat to 
    medium. Transfer the noodles into the saute pan and finish cooking until 
    the noodles are al dente and the sauce has thickened. Add more water 
    if necessary.
     
5. Off the heat, add the chopped parsley and the cheese and serve.

Wednesday, August 24, 2011

Mei's Cold Noodle Dish

Copyright 2011 LtDan'sKitchen blogs
This is another dish I learned from a Chinese friend of mine, Mei, who gave me the list of ingredients but found it hard to explain how to actually prepare it. I've seen her do it numerous times and the few times I tried, the more frustrated I got by not being able to replicate how she prepared the dish. It did nothing to lessen the craving I have for it though. As with most Asian dishes, it is mostly prepared by taste, feel and most important of all, experience. However, I think that my best bet is to change things around and make it my own and at the same time, stay true to how the dish was prepared.

Copyright 2011 LtDan'sKitchen blogs
It was actually while writing the post about Lidia's Fiery Spaghetti that I remem-bered this dish. My friend used angel hair pasta but I figured a Japanese noodle might be a better option so I decided to use Somen noodles. You might be concerned about the amount of oil I used but the oil is necessary as it is used for both frying the seasonings and as a dressing. The sesame oil and toasted sesame seeds are my own addition to the dish as a garnish. A word of caution though, this dish does not keep well so make only enough that will last for a day at the most. This recipe is probably the closest thing I could ever get to Mei's version. 

Mei's Cold Noodle Dish

4-5 garlic cloves, finely minced
2 tsp coarse salt
2 tbsp Hatch New Mexico chili powder
1/4 cup rice vinegar
1/4 cup canola oil
1 tbsp honey
1 tbsp brown sugar
16 oz Somen noodles
1 small cucumber
sesame oil and toasted sesame seeds (to garnish)

1. In a deep sauce pan over medium heat, heat the oil. Add the garlic and 
    cook until slightly toasted. Add the salt. 

2. Very carefully, add the chili and mix well. Turn off the heat. Add the 
    vinegar, honey, and brown sugar. Check for flavor. Set aside. 

3. While making the chili sauce, boil the water and cook the Somen 
    noodles per packet instructions. Once cooked, shock the noodles in ice 
    water to stop the cooking process and to cool them off fast. 

4. Peel or partially peel cold cucumber and slice thinly. Set aside.

5. To assemble, drain the noodles and add to the chili dressing. Toss to 
    combine. Add the cucumber and mix well. Serve with a drizzle of 
    sesame oil and a sprinkling of toasted sesame seeds. 

Tuesday, August 23, 2011

Chard in Orange Fennel Sauce

Copyright 2011 LtDan'sKitchen blogs
Here is another recipe inspired by free organic chard leaves given to me by a friend of a friend. These chard leaves are younger so I was told I could use the stalks as well. Usually, the stalks are discarded as they tend to be too tough. There is however, still a bitter taste to the leaves but the sweetness of the orange balances it out nicely. The cooking process is supposed to neutralize the bitterness leaving a delicate flavor similar to that of spinach. 

This dish is actually a thanksgiving side dish that is served with well, turkey and all the fixins. As a warm salad on its own though, it actually tastes mellow especially since the younger chard leaves were used. Overall, I do love this dish and the orange juice really does give this dish a well rounded taste.  

Chard in Orange Fennel Sauce

Copyright 2011 LtDan'sKitchen blogs
1 bunch of chard, about   1/2 lb
1 tbsp unsalted butter
1/2 medium onion, sliced   thinly
1/2 tsp orange zest
juice of 1 orange
1/4 tsp fennel seeds
salt and pepper
olive oil


1. Over medium heat, 
    melt butter in a 
    sauce pan. Add the
    onion and cook until slightly browned on the edges. Add the fennel seeds 
    and cook for one minute. 

2. Add the orange juice and heat until it starts to boil. Add the chard leaves 
    and cover. Lower the heat to low. 

3. Cook with the cover on for about 4 minutes. Remove the cover and cook 
    for an additional 3-4 minutes or until the sauce has thickened. 

4.  Season with salt and pepper. Drizzle with the olive oil and serve 
     immediately.

Monday, August 22, 2011

Zucchini Quick Breads

Giant zucchinis the size of my 9"x15" cutting board
Copyright 2011 LtDan'sKitchen blogs
Zucchini is one of those unheard of vegetables when I was still living in the Philippines. I learned of it from one of the baking cookbooks I bought and one of the entries is a zucchini cake. The zucchini looked like a cucumber to me but I had really no clue what it was. It was only when I was living here in the US did I come across it again. I've had it several times in kebab form or in stir fry dishes but I just totally forgot about zucchini as an ingredient in a cake. 

Copyright 2011 LtDan'sKitchen blogs
Enter, my co-worker Jesse who gave me two giant-sized zucchini from their community garden. With this bounty, I had to come up with inspired recipes since I can only eat so much zucchini breads. Thus, this first post about zucchini will start with quick breads that feature zucchini as the main ingredient. The recipes are based on the website Joy of Baking which I'm sure you all know is one of my favorite baking blog. The first recipe is regular Zucchini bread. This quick bread is very simple with the addition of chopped nuts and coconuts which add an extra crunch. I followed the recipe quite religiously and my choice of oil was canola and for the nuts, pecans. I made a big batch and brought two loaves to work and they were really good. Very moist and not overly sweet, it was a good snack especially when paired with hot coffee or tea. 

Copyright 2011 LtDan'sKitchen blogs
The second quick bread I made was Chocolate Zucchini bread. Again, using the recipe from the Joy of Baking blog and following the recipe without making any changes as well, I made three loaves since I'm gifting two of them to friends who I know will love them. They better! This bread is almost like a chocolate cake in bread form and the zucchini adds to the moistness and texture making this bread really rich and amazing. The zucchini actually disappears in the cake you can barely detect its presence. It was definitely worth making. I might just make this for the Church garage sale as my donation. I made pumpkin breads last year and zucchini breads might be the way to go this year. 

Zucchini Lasagna

Copyright 2011 LtDan'sKitchen blogs
Part two of the zucchini saga features a main dish. I've used zucchini to replace part of regular pasta before to up the healthy quotient of the dish but to replace the entire pasta with zucchini is something I haven't tried yet. Given the gargantuan size of the zucchini I have with me, lasagna seems to be the best candidate for such an experiment. Looking through the internet, it becomes apparent that this idea is not novel as proven by the number of recipes available on the web. Still, I'm using my own recipe for the tomato sauce and incorporating some of my ideas on preparing this dish. One thing I want to do though is make this dish gluten-free. To achieve this, I need to do away with using a bechamel sauce to complement the gravy (tomato sauce) and use ricotta cheese instead.

The one thing to remember about this dish is that doing away with the pasta means that all liquids are contained in the dish. The lasagna is a bit watery once you cut into it but I really don't mind it one bit. The "broth" has a rich flavor and a slice of bread might be a good way to take care of this issue. Two things you can do though is to sweat the zucchini a lot longer or you can add more tomato paste so that you don't introduce more liquid into the dish.   
Zucchini Lasagna

2 lbs ground beef
1 onion, diced
3 cloves garlic, minced
2 30-oz diced tomatoes, canned
4 tbsp tomato paste
1/2 tsp each of dried oregano, thyme and basil
1/4 cup fresh parsley
1 15-oz ricotta cheese
2 cups shredded mozarella
2 tbsp olive oil
salt and pepper
3-4 lbs zucchini

1. Over medium heat, heat the olive oil in a sauce pan. Add the garlic and 
    onions and cook until softened. Season with salt and pepper. 

2. Add the dried herbs and cook for about a minute. Add the beef and 
    season with salt and cook until it loses its pink color. Add the canned 
    tomatoes and simmer for about 30 minutes. 

3. Add the tomato paste and adjust the seasoning. Set aside and cool. 

4. While making the sauce, slice the zucchini crosswise into thin slices and 
    salt to sweat for about 30 minutes. Collect the zucchini slices and in a 
    colander, wash with cold water and drain well. 

5. To assemble, spread about 1/2 cup of sauce on a 9x13 baking dish and 
    layer the zucchini slices to cover the whole pan. Ladle with a third of 
    the sauce and top with dollops of ricotta and a third of the mozzarella 
    cheese. 

6. Continue layering the ingredients until you end up with the cheese layer. 
    Garnish with the chopped parsley and bake for an hour at 350°F.  

Zucchini Casserole

Copyright 2011 LtDan'sKitchen blogs
For the final installment on the zucchini saga, I now give you a casserole recipe that is a cross between a quiche and a lasagna. Adapted from a recipe I found on the web, I've changed the recipe just a bit to give it some more flavor. The original recipe seemed a bit bland. It does use up a lot of zucchini which works well in my favor. The dish is light enough for lunch but I think that it is hearty enough for a dinner meal.

Zucchini Casserole

1 cup flour
1 tsp baking powder
1/2 tsp salt
1 medium onion, chopped
3/4 tsp Cajun powder
1/4 tsp dried thyme
1/2 lb bacon, diced
2 cup shredded Cheddar/Colby Jack cheese
4 large eggs
2/3 cup half and half
1/4 cup chopped parsley
4 cups very thinly sliced zucchini

1. Heat oven to 350°F. Grease and flour a 9 x 13-inch baking pan.

2. In a saute pan, cook the bacon until it renders its fat and just browned. 

    Remove from the pan and set aside. In the same pan, cook the onions 
    until softened. Add to the bacon and let cool.

3. Once cool, add the flour, baking powder, salt, Cajun powder, and 

    thyme to the cooked onion and bacon. 

4. In a small bowl, whisk the eggs with the cream. Add egg mixture to the 

    dry mixture and stir until blended. Fold in the cheese and zucchini.

5. Spread in the prepared baking pan and bake for about 40 - 50 minutes, 

    until set and lightly browned around the edges. Cool slightly.

Caesar Salad

Copyright 2011 LtDan'sKitchen blogs
As the saying goes, "when somebody gives you lemons, make lemonade". But, when somebody gives you organic lettuce, I say you make Caesar Salad. This is probably one of my favorite salads but since the dressing is basically egg yolks emulsified with olive oil, I make this only on special occasions. The last time I made my own Caesar Salad dressing was back in 2004 when I was at home on vacation and we had guests staying with us. Back then, I followed a recipe that used coddled eggs (cooked in boiling water for two minutes to partially cook it). For a much smaller batch of salad though, I decided to go a bit more authentic but I had to modify the recipe and approximate the amounts. I also did away with the anchovies which cuts down the salt factor quite a bit. Overall, this recipe will be enough to dress about 4 cups of lettuce leaves and will serve two.

Caesar Salad

Copyright 2011 LtDan'sKitchen blogs
2 egg yolks
1/8 tsp grated garlic
1/4 tsp Worcestershire   sauce
salt and pepper
olive oil 
juice of 1/2 lemon
4 cups lettuce leaves,   shredded
1/4 cup chopped pecans or   walnuts
2 tbsp shredded Pecorino   Romano cheese plus   more for garnishing

1. In a bowl, mix the egg yolks, Worcestershire sauce, garlic, and lemon 
   juice. With a whisk, drizzle in the olive oil until the mixture thickens.  
   This might need 2 tbsp of olive oil or a little bit more. 

2. Season with salt and pepper. Add the cheese and whisk one last time. 

3. Drizzle dressing over the lettuce leaves and garnish with the chopped 
    nuts and more cheese. Serve right away.

Sunday, August 14, 2011

Plum Coffee Cake - Non-Dairy Cake 2

Copyright 2011 LtDan'sKitchen blogs
Another non-dairy dessert that I thought was worth trying is this simple cake that came out quite good despite the substitutions I've used to modify it. I've made crepes filled with plums before but this cake uses the smaller variety of plums and the tart flavor of the fruit balances out the sweetness of the cake. The cake is very moist due to the use of canola oil and even with the non-dairy sour cream substituted for the yogurt, the cake was really light and delicious in its simplicity. By the way, non-dairy yogurt is available in stores now but since I had extra non-dairy sour cream in the fridge, I used that instead. 

Copyright 2011 LtDan'sKitchen blogs
The recipe was taken from the Joy of Baking website and I've been actually eyeing this recipe for some time now. I had the choice of making a plum tart but since I don't own a tart pan and I'm not a big fan of tarts (the dessert), I opted for this coffee cake instead. Just like the blueberry cake, this cake goes well with ice cream. I had the approval of a two year old guest so I know that this cake was definitely a winner. I think this cake will also work with smaller peaches, and even with dark plums and pluots.

Fresh Blueberry Cake - Non-Dairy Cake

Copyright 2011 LtDan'sKitchen blogs
Okay, don't panic. I haven't gone vegan yet. I just have friends who are lactose intolerant and to deal with this situation, I've been trying out regular dessert recipes and substituting dairy ingredients with non-dairy substitutes which thankfully are becoming more popular here in the US right now. I do try to make the effort of making something that is as close as possible to the regular recipe without having my friends eat cake that taste like cardboard. I've managed to make the substitution work with tiramisu and pumpkin roll and even blueberry cheesecake but since this summer season boasts wonderful berries and stone fruits, I figured, go with something simple that can be paired with non-dairy ice cream. 

Copyright 2011 LtDan'sKitchen blogs
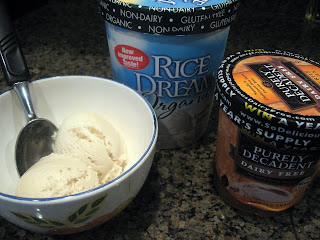
Another discovery I've made along with this experiment is non-dairy ice cream. There are about three popular brands available here in Bozeman and they use either soy, rice or coconut milk to make this wonderful treat. The flavors are a bit limited but the coconut-based ice cream is the closest thing to regular ice cream. It was really amazing and went well with the non-dairy cake.

This recipe is based from my encyclopedia of recipes, the Woman's Day Encyclopedia of Cookery and the blueberries are courtesy of my friend Paul. I'll present the recipe in its original form for those who want to make it as is and I'll note down any substitution that I used to make the cake.

*Fresh Blueberry Cake - Adapted

Copyright 2011 LtDan'sKitchen blogs
1 1/2 cup all purpose flour
2 tsp baking powder
1/2 tsp salt
1/2 cup shortening   (vegetable shortening)
1 cup sugar
1 tsp vanilla extract
1 egg
2/3 cup milk (soy milk)
1 1/2 cup fresh   blueberries, washed
2 tbsp all purpose flour
1 tbsp sugar
Lemon glaze

1. Preheat oven at 350°F. In a bowl, sift the flour, baking powder, and salt.    
2. In another bowl, gradually add the sugar into the shortening. Blend in 
    the vanilla and the egg. 

3. Add the flour mixture alternately into the butter mixture with the milk
    until just incorporated. 

4. In a small bowl, mix the 2 tbsp flour, 1 tbsp sugar and the blueberries. 
    Fold into the batter. 

Copyright 2011 LtDan'sKitchen blogs
5. Turn batter into a well 
    greased and floured 
    10-inch round pan and 
    bake for 60 minutes.
    Check by inserting a
    toothpick and make
    sure it comes out 
    clean. 

6. Cool to room 
    temperature and 
    transfer into a serving 
    platter. Decorate 
    with the lemon glaze. 

7. To make glaze, mix 1 cup of confectioner's sugar and 2 tbsp lemon juice. 
    Mix well until you end up with a thick glaze. 

*Woman's Day Encyclopedia of Cookery Volume 2, Fawcett Publications, Inc., Maryland: 1965

Strangozzi alla Spoletina

Copyright 2011 LtDan'sKitchen blogs
Strangozzi is a traditional long and irregularly hand-cut pasta from Spoleto. Strangozzi means "strangled priests" which is a bit macabre but the history of the pasta dates back during the time when the region was in rebellion againsts the papal dominion in the 14th century. The sauce for the dish is a bit on the peppery side traditionally made with southern Italian peppers. The heat, however, mellows out if you make the sauce the day before and you end up with just a hint of the heat in the pasta which is quite nice. 

The pasta recipe was a bit dry so I had to add more liquid to it to keep the dough together. I also had problems rolling it after drying the pasta for about 10 minutes so I had to cut them as sheets instead of rolls which meant that the pasta was a bit wider than it should be. I've seen on television how strangozzi is made traditionally so I might go hunt down an alternative recipe. As it is right now, I'll post the pasta dough recipe and include the changes I've made to it. If pasta making is not your thing, go with a thin fetuccini or even spaghetti noodles to save you some time.

*Strangozzi alla Spoletina - Adapted

Pasta Dough:
3 2/3 cups all purpose flour
2 tsp salt
5 large eggs, beaten
5 tbsp olive oil

Tomato Sauce:
3 tbsp olive oil
2 garlic cloves, minced
1/2 tsp red pepper flakes
35 oz peeled, whole tomatoes (canned) 
salt and pepper
1/2 cup chopped parsley

1. To make the dough, combine the flour and salt in a bowl. With the dough 
    hook at low speed, add the eggs until moist crumbs form. Add the oil 
    and continue to process until the oil is incorporated. 

2. Turn the dough into a lightly floured surface and form into a disc. 
    Wrap in clingfilm and let it rest for an hour. 

3. To make the sauce, heat the olive oil in a large pot over low heat. Add 
    the garlic and pepper flakes until the garlic turns golden brown. And 
    the tomatoes and their juices (crushed by hand) and simmer over 
    moderately low heat for about 30 minutes. 

4. Season with salt and a generous amount of black pepper. Keep warm. 

5. Once the dough is ready, cut into six portions and roll each portion using a 
    pasta machine from the thickest setting to the next to the thinnest 
    setting. If the pasta get a bit too long to handle, cut in half. 

6. Let the pasta sheets dry for about 2 minutes and roll into a log . Slice 
    crosswise into 1/4 inch strands and unfurl. Arrange them loosely on a lined 
    baking sheet. 

7. Boil a large pot of water and season with salt. Add the pasta and cook for 
    about 2 minutes and transfer the cooked noodles into the tomato sauce 
    that has been simmering over low heat. Toss and add the parsley. 

8. Serve immediately and pass the cheese (Pecorino or Grana Padano) at the 
    table if preferred.

*Food and Wine, October 2000, page 218

Stuffed Eggplants

Stuffed Eggplant with Ground Chicken
Copyright 2011 LtDan'sKitchen blogs
I've learned how to make this dish ever since Phillipp, a German friend made a German version of stuffed eggplants when he was here last year. I've seen a version of Michael Chiarello on television some time ago but it was good to try out his recipe only to find out that it is actually very good. Back home, we have a simpler version where the eggplants are roasted with the skins on, then peeled and flattened with a fork and stuffed by piling up a mixture of ground meat on the mashed eggplant. The whole concoction is then carefully fried until browned and you end up with a pregnant looking eggplant that was best eaten with tomato ketchup. 


Stuffed Eggplant with Ground Beef
Copyright 2011 LtDan'sKitchen blogs
Michael Chiarello's version is a bit different since large eggplants are used and not the long and thin Japanese eggplant variety. The eggplant is hallowed out and the eggplant meat is boiled until softened and is chopped and added into the stuffing. Another thing to remember is that I doubled the amount of meat in the original recipe. I just thought it needed more meat and it does not hurt the recipe one bit. I've also made this before where I used Italian sausages instead of beef and even ground chicken or turkey are good substitutes as well. If using seasoned meats though, make sure that you make the necessary adjustments and go easy on the salt.

Farro/Barley, Cherry Tomato and Arugula Salad

Copyright 2011 LtDan'sKitchen blogs
This is another recipe taken from an old issue of Food and Wine magazine. The picture of the dish had always intrigued me, it being a simple salad with just three ingredients: farro, cherry tomatoes and arugula. I have made this numerous times while living in Atlanta and not knowing nor bothering to look up what farro was, I used orzo pasta instead. Arugula was quite hard to find so I used baby spinach leaves instead. Despite the changes I made, the dish held up in terms of flavor and texture. 

I finally made a more authentic version of the recipe except that I still could not find farro. However, barley is very much available and has the same texture and even the same look as farro. It was very cheap as well coming in at 99c per pound. This is definitely a healthy salad and is good for those who have issues with gluten as well. 

*Farro, Cherry Tomato and Arugula Salad - Adapted

1 1/2 cup barley or farro
1/3 cup olive oil
1/4 cup balsamic vinegar
salt and pepper
1/2 lb cherry tomatoes, halved
2 handfuls arugula or baby spinach

1. Cook the barley as you would pasta and cook until al dente which will take 
    about 25 minutes. Drain and let cool to room temeprature. 

2. Mix the olive oil and balsamic vinegar and season with the salt and pepper. 
    Toss in the tomatoes and add to the barley. Mix well. 

3. Add the arugula and mix well. Serve immediately. 

*Food and Wine, October 2000, page 184