Recipes

Showing posts with label Dinner Menu. Show all posts

Saturday, February 14, 2015

Rustic Roasted Chicken Galantine

Copyright 2015 LtDan'sKitchen blogs
Chicken Galantine is a French dish that is prepared to impress. It is laborious, both in the preparation and in the cooking process. The ingredients are varied but there seems to be a common thread among the different recipes I read to prepare my own rustic version of this dish. The filling is usually prepared using either ground veal or beef in combination with ground pork. The nut of choice are pistachio nuts with either apricot or raisins to add some nuttiness and sweetness respectively, to the flavor. Traditionally ground into a forcemeat, I am going to prepare my filling more like a meatloaf preserving the texture of the various ingredients intact for maximum impact. Truth be told, I'm not a big fan of cold cuts and the galantine is prepared to resemble one. Another big change is how I plan to cook my galantine. The original recipe calls for the galantine to be wrapped in cheesecloth and poached in a broth. I am baking my galantine and serving it warm.

Rustic Roasted Chicken Galantine

3-4 shallots, finely diced
2 tbsp unsalted butter
50g pistachios, shelled and roughly diced
1 whole chicken, about 2 lbs
1/2 lb ground beef
1/2 lb ground pork
1/2 lb bacon strips
5 tbsp heavy cream
1 egg, beaten
1/3 cup golden raisins
4 tbsp white wine
1/2 tbsp dried thyme
salt and pepper
olive oil

1. Debone the chicken leaving the leg and wing bones intact. Set aside. 
    Preheat the oven to 350°F.

2. In a small pan over medium heat, melt the butter and saute the shallots 
    until softened. Let cool.

3. In a large bowl, combine the rest of the ingredients except the bacon. Add
    the shallots and mix with your hands. Season with salt and pepper.

4. Lay flat the deboned chicken, skin side down and season with salt and 
    pepper. Layer the bacon strips until it covers the inside of the chicken. 

5. Fill with the meat filling and gather the edges securing with a toothpick or 
    by sewing. Truss the chicken with a butcher's twine and place in the 
    center of a baking pan lined with aluminum foil seam side down. Baste 
    with enough olive oil to help brown the skin.

6. Bake for 1 1/2 hour or until a meat thermometer reads 160°F. Let it rest
    for 15 minutes covered with foil before slicing.    
    

Tuesday, December 31, 2013

Baked Stuffed Chicken

Copyright 2013 LtDan'sKitchen blogs
The birth of this dish came about when we were trying to put together bacon, butter, cheese and chicken into one dish. A quick search on the internet came up with a stuffed chicken recipe that was both simple as well as tasty. However, given my penchant for making any recipe a bit more personal, I tweaked the recipe once again until I came up with a winning formula. By then, the butter and cheese bits were no longer included in the recipe. This was a big hit during my Christmas lunch celebration with family and friends and for the literary folks, it has a bit of 50 shades thrown in for good measure. I should really call this dish 50 Shades of Poultry but then again, I better not.

A few things to keep in mind if you plan to try this dish are: one, learn how to partially debone a chicken. By partial, I meant leaving the drumstick intact. It saves you time when baking it and two, you need to learn how to sew and tie up a chicken. No worries however, as both can be easily learned and once perfected, it will only take about 15 minutes to debone a chicken and stuff it with any filling that suits your fancy.

Baked Stuffed Chicken

2 2-lb whole chicken, deboned
1 large onion, diced
4 garlic cloves, minced
2 tbsp parsley, chopped
1 cup brown rice, cooked
1 cup bread crumbs
1/2 tsp Herbes de Provence
8 strips of bacon, diced
salt and pepper

1. In a skillet over medium high heat, brown the bacon. Once browned,
    remove to a plate and set aside. 

2. In the same skillet, saute the onions and garlic in the bacon drippings. 
    Season with salt and pepper and cook until softened. Let cool. 

3. Prepare the filling by adding the cooked rice, crisped bacon, parsley and 
    bread crumbs with the sauteed onions and garlic. Mix well. 

4. Season the inside of the chicken with salt and pepper. Stuff with half the
    filling and secure both ends of the chicken with a twine. Further secure
    the chicken with more twine to retain the shape of a whole chicken. Do 
    the same for the second bird.

5. Set both birds in a baking pan cut side down and season with more salt 
    and pepper. Drizzle enough olive oil to baste the chicken. Sprinkle the 
    Herbes de Provence and bake in a preheated oven at 375°F for about 
    an hour or until the skin is golden brown.

6. Let rest for about 5 minutes before carving. 
      

Tuesday, November 26, 2013

Chicken Asado

Copyright 2013 LtDan'sKitchen blogs
This is a chicken dish that I never really thought was remarkable enough but given the simplicity of this dish, it just might prove to be a time-saver when you have nothing but chicken in your freezer plus a few spices and seasonings that might already be in your cupboard. I was advised by my doctor to stick to fish and chicken in a bid to lower my uric acid level but since it was not getting to the point where it should be and I really do not want to take any medication, I had to give up chicken as well. This dish was then part of a plan to get rid of the chicken that I bought during my weekend grocery and to have nothing but fish in the freezer. 

Asado is a common term used in Mexican dishes while living in the US or to put it in the right context, Tex-Mex. There is also a variety of steamed meat buns that has an asado filling but is usually made with pork. It has a sweet unlike the asado of Mexican derivation which is more spicy and is chili-based. It turns out that chicken asado is more of the sour variety with nary the sweetness associated with an adobo dish which is quite similar in terms of preparation. After looking up a few recipes, I came up with a simple version that is sure to please people on the go who wants to eat something nourishing and tasty. 

Chicken Asado

2 lbs chicken cut up
4 small potatoes, peeled and quartered
4 garlic cloves, minced
1 large onion, diced
4 large Roma tomatoes, diced
1/4 cup soy sauce
2 tbsp balsamic vinegar
2 tbsp lemon juice
2 dried bay leaves
salt and pepper
4 tbsp vegetable oil
1 cup water of broth

1. Marinade the chicken in half the garlic, lemon juice, balsamic vinegar, soy 
    sauce and season with salt and pepper. Allow to sit for at least 30 minutes.

2. In a large skillet over medium high heat, saute the remaining garlic with 
    the onions in the vegetable oil. Season with salt and pepper and cook until 
    soft and fragrant. Add the bay leaves and cook for another minute. 

3. Add the marinated chicken and brown them in the skillet on all sides. Save 
   the marinade. 

4. When the chicken has browned, pour the marinade and the water or broth 
    and bring to a boil. Once boiling, add the tomatoes and cook covered for 
    about 10 minutes.

5. Remove the lid and add the potatoes. Lower the heat to medium low and 
    simmer covered until the potatoes are tender but still holds its shape. 

6. Check for flavor and adjust accordingly. Serve with steamed white rice.

If you want the dish to be a bit thicker, raise the heat back to medium high and allow the sauce to reduce. If the potatoes and chicken pieces are getting overcooked, spoon them out and reduce the sauce on its own. Make sure you check the flavor as it might be too salty so you may have to add some water. Pour the sauce over the chicken pieces and potatoes and serve immediately.

Thursday, November 7, 2013

Marinated and Seared Chicken with Tomatoes and Basil

Copyright 2013 LtDan'sKitchen blogs
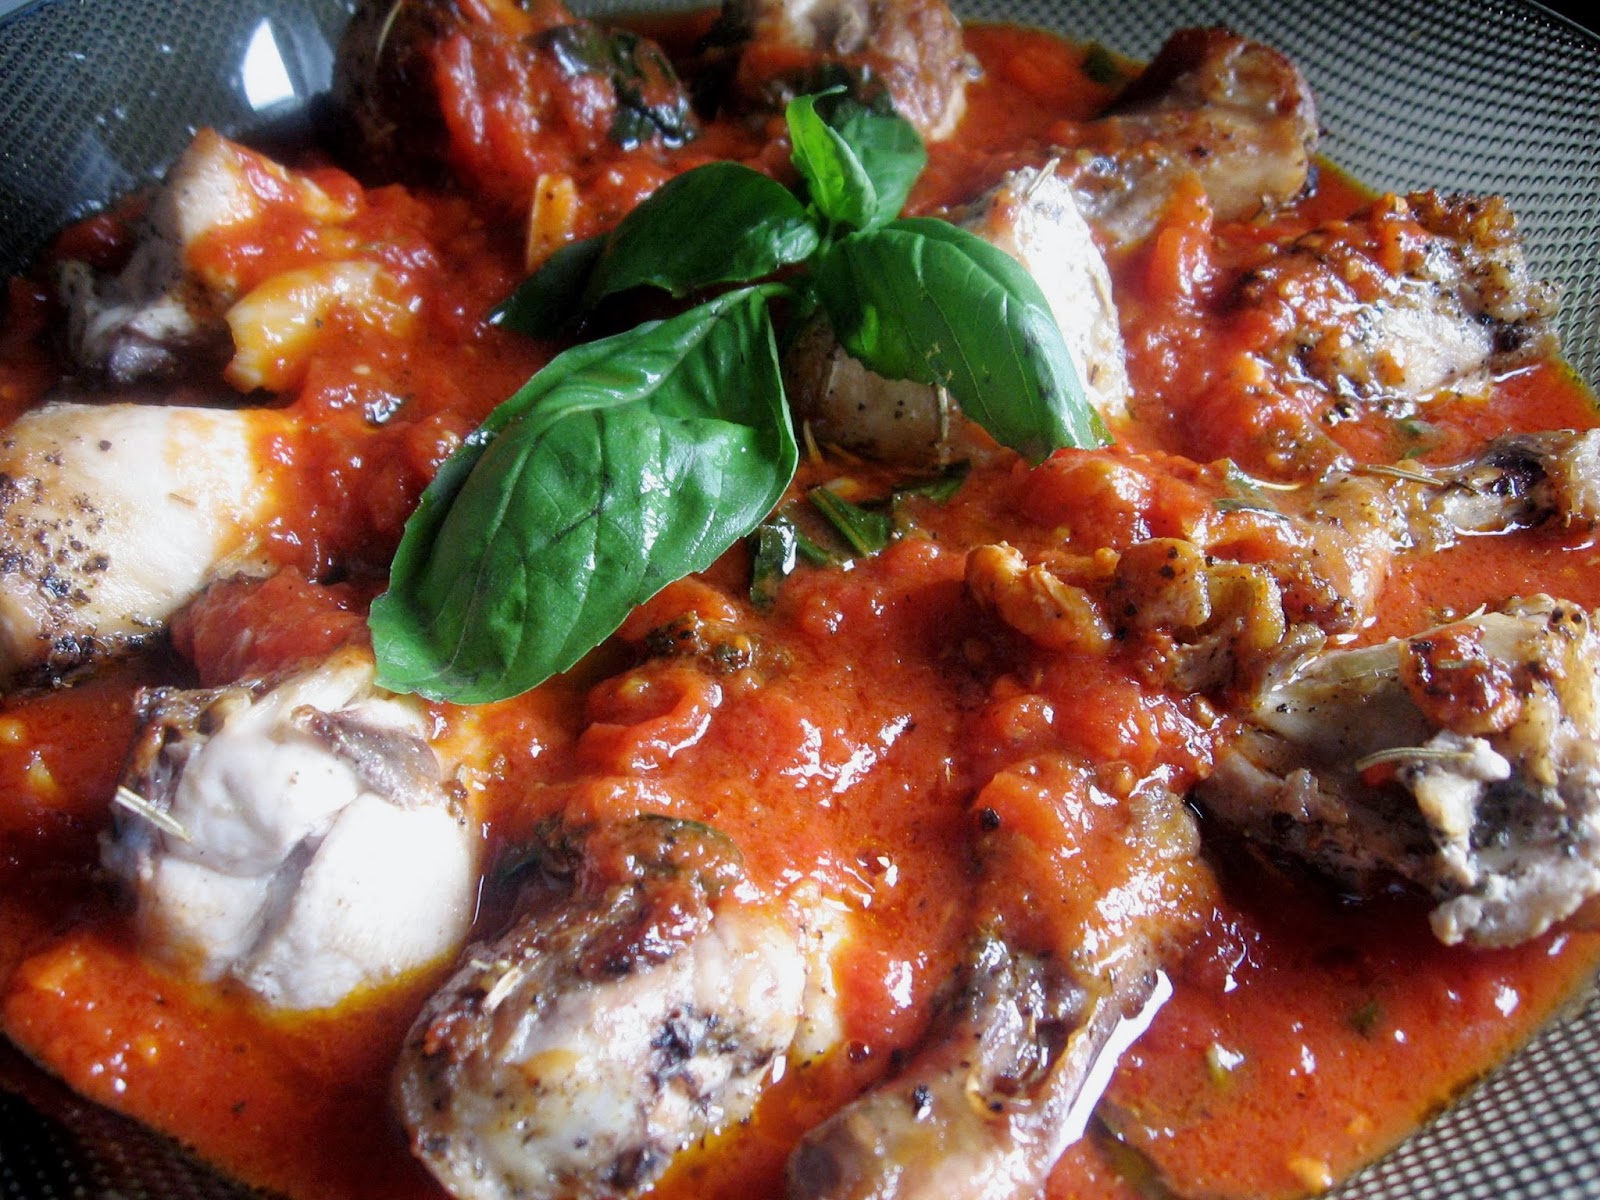
Looking for a healthy recipe to accompany my baked flounder on the family's November 1st celebration, I decided to use one of Lidia's recipe. The original recipe actually used chicken breasts of which I am not a big fan of, so I decided to use regular chicken pieces and change the recipe just a tiny bit. The result was really good and even though I only tasted a small portion of it, this dish to me says nothing else but, ITALY!

Just in case you are wondering what is the relevance of November 1st, well, it is the time of the year when we remember our family members who have died. Although All Soul's Day falls on November 2nd, for some strange reason, Filipinos celebrate this special day a day early. We also usually prepare a lot of dishes cooked in coconut oil but since my Mom is no longer around, it is me or my cousin who does the most work during family occasions. We both decided to go simple so I made the main dishes (and I went the Italian route) while she made the native dishes that uses either coconut milk or just plain grated coconut meat. This recipe is indeed a strange departure from the usual dishes prepared on this special day but it surely made our lives a lot more easygoing that day.

Marinated and Seared Chicken with Tomatoes and Basil - Adapted*

2 lbs chicken pieces
4 garlic cloves, crushed
1 tsp dried rosemary
1 tsp dried sage
1/2 cup olive oil
1 tsp salt
1/4 tsp pepper

Sauce:
1 28-oz whole tomatoes, canned
8 garlic cloves, sliced
1/8 tsp red chili flakes
salt
1/2 cup basil leaves, julienned

1. In a large bowl, combine the chicken with the garlic, dried herbs, half the 
    olive oil and season with salt and pepper. Cover with a clingfilm and store 
    in the fridge overnight. 

2.  In a deep skillet over medium heat, add the remaining olive oil and once 
     heated, fry the chicken pieces in small batches until browned and cooked 
     through. Set aside. 

3. In the same skillet, add the garlic into the drippings and saute until golden 
    brown. Add the chili flakes and saute for a minute. 

4.  Pour the tomatoes into a bowl and crush them with your hands. Wash off 
     the can with a cup of water and add to the bowl of crushed tomatoes. 
     Add into the skillet and bring to a boil.

5. Once boiling, decrease the heat to low and allow to simmer covered for 10 
    minutes. 

6. Check the sauce for flavor and season with salt. Add the basil leaves and 
    stir. Cook for another minute. 

7. To serve, ladle about half the sauce in a serving platter. Arrange the 
    chicken pieces and sppon the rest of the sauce on top of the chicken. 
    Garnish with a sprig of basil.

*Lidia's Italy: Seared Marinated Chicken with Tomatoes and Basil.
 

Buttered Fried Chicken

Copyright 2013 LtDan'sKitchen blogs
This one is definitely in the books for any cardiologist as a definite NO when asked if fried chicken is okay. To top it off, this version was deep fried in butter. Yep, pure, unadulterated unsalted butter. Hey, at least it is unsalted. 

Anyway, the "restaurants" or eateries in the municipality of Miagao offer what they call buttered fried chicken which has become a favorite whenever we eat out. They offer three versions I believe. There is the garlic fried chicken, the regular and then the buttered kind which is our favorite. Well, my favorite anyway.

On a dare, we decided to make this for dinner. This was actually paired with the Chicken Skin barbecue and a side of Mung Bean Stew. So technically, all three were off limits to me. I ended up eating a piece of the buttered chicken and a stick of the barbecue for dinner that night. Hey, the cook has got to eat!

Buttered Chicken

2 lbs chicken pieces
salt and pepper
2 sticks unsalted butter (1 cup)

Seasoned Flour:
1 cup all purpose flour
1 tsp salt
1/4 tsp pepper

Seasoned Bread Crumbs:
2 cups panko bread crumbs
1/2 tsp salt
1/4 tsp Spanish paprika
1/8 tsp cayenne pepper
1/4 tsp dried thyme

Egg Wash:
2 large eggs beaten with
2 tbsp water

1. Season the chicken pieces with salt and pepper. Let sit for about 5 
    minutes. 

2. Melt the butter in a deep skillet over medium low heat. While butter is 
    melting, dredge the chicken pieces in the flour mixture. Tap off the 
    excess flour. Do this individually or in small batches. 

3. When the butter has melted and ready for frying, dip the dredged 
    chicken pieces in the egg wash and then roll in the bread crumb mixture. 
 
4. Drop the breaded chicken in the butter and fry about 4 to 5 pieces at a 
    time. Increase the heat to medium and fry until golden brown on both 
    sides. Drain on brown paper bags or paper towels. 

5. Fry the rest of the chicken pieces in small batches. 

Baked Flounder

Copyright 2013 LtDan'sKitchen blogs
I was going through the fish aisle in the grocery store when I spotted this rather flat looking fish which after asking the fishmonger was what I thought it was, a flounder. I  asked my Dad if he wanted to try it and he said , "No!" My Dad has a thing for the bigger species of fish, he prefers them small. 

The following day however, I spotted the same fish in the other grocery store that I frequent and right there and then, I bought two of them to cook for the November 1st celebration instead of the usual pork or meat dishes that we serve. The question now is, how to cook it. Flounder are sold fileted in the grocery stores back in the US. I have the real deal so I need to find a good way to cook it other than to fry it which was a suggestion by the fishmonger. 

After browsing through the internet, I found a simple recipe that lends an Italian flair to the dish. Baked in nothing more than olive oil, tomatoes and a few herbs and spices, I knew I found my recipe. 

Baked Flounder - Adapted*

2 lbs flounder, gutted and descaled
1 lb cherry tomatoes, halved
8 garlic cloves, crushed
2 tbsp basil leaves, julienned
juice of one lemon
1/4 tsp Herbes de Provence
salt and pepper
olive oil

1. Preheat the oven to 375°F. In a bowl, combine the tomatoes, garlic, basil
    leaves, Herbes de Provence and lemon juice. Season with salt and pepper. 
    Drizzle in about 2 tbsp of olive oil and transfer to a lined baking sheet.

2.  Bake the tomatoes in the oven for about 5 minutes. Meanwhile, season 
     the fish with salt and pepper on both sides.

3. Lay the fish on top of the pre-baked tomatoes and drizzle with more olive 
    oil. Return into the oven and bake for another 25 to 30 minutes.  Check if 
    the fish is cooked through. Otherwise, bake for another 5 to 10 minutes.

4. To serve, transfer the fish into a large serving platter and spoon the 
    tomatoes and the sauce on top. Garnish with a drizzling of more olive oil 
    and more julienned basil leaves. 

*Bon Appetit: Baked Flounder with Tomatoes and Basil.
 

Thursday, October 17, 2013

Beef Stewed in Beer with Caramelized Onions

Copyright 2013 LtDan'sKitchen blogs
This is a dish that I tried because it is something I cannot eat. Due to my uric acid problems, I had to sacrifice by not eating a beef dish that looked so appetizing during a meeting I attended about a week ago. I had to settle for a piece of fried chicken while my friends gorged on this beautiful beef dish topped with caramelized onions. My guess was that it was "bistek", or what is the Filipino version of beef steak. 

The term bistek is really a misnomer I think considering that this dish is referred to as our local answer to the American favorite, the steak. For one, the meat is usually marinated in soy sauce and calmondin and the only seasoning for a good steak if you ask a purist is simple salt and maybe a dash of pepper. Two, the meat is sliced very thinly so that it will take only a couple of minutes to cook without the meat becoming rubbery while a good steak is about at least an inch thick. Lastly, it is usually served with caramelized onions as a garnish while a good steak needs no condiments on the side. 

Anyway, back to our dish. With just my instinct and my imagination of what the dish might taste like, I decided to prepare something that resembled the beef dish I was deprived of using a recipe that combined stewing beef in beer and the traditional flavors for bistek. What I created was indeed a version that was surely delectable to look at and after a taste test, my friend informed me that my dish was very similar in taste to what was served in the meeting. That was indeed good enough for me.

Beef Stewed in Beer with Caramelized Onions

3-4 lbs of beef, unsliced
1/3 cup calmondin juice or lemon juice
1/4 cup soy sauce
2 tbsp Worcestershire sauce
2 tbsp honey
1/4 tsp black pepper
1 tsp salt
8 cloves of garlic, minced
2 bottles of lager
6 bay leaves
1 1/2 ponds of Spanish onions, sliced
2 tbsp unsalted butter
6 tbsp vegetable oil

1. Marinate the beef in half the garlic, 3 bay leaves, soy sauce, honey, 
    Worcestershire sauce, calmondin juice and season with salt and 
    pepper. Cover and store in the fridge for at least two hours. 

2. In a large pot, heat half the oil and saute half the garlic and the 3 bay 
    leaves over medium high heat. Season with salt and pepper. Once the 
    garlic has softened, brown the meat in the pot on all sides.

3. Once the meat is browned, add the beer and the marinade into the pot. 
    Make sure that the meat is totally submerged and add more water if 
    needed. Bring to a boil.

4. Once boiling, adjust the heat to low and cook covered until the meat is 
    tender. This will take about 2 hours. Check occasionally to make sure that 
    it has not dried out. 

5. When the meat is tender, check for flavor and adjust with salt and 
    pepper. Add the unsalted butter and allow to melt into the sauce.

6. In a large skillet, heat the remaining vegetable oil over medium high heat. 
    Saute the onions until softened. Season with salt and keep cooking until it 
    has turned golden and is very soft. Set aside.

7. To serve, slice the beef into thin rounds and top with the caramelized 
    onions. Drizzle the sauce over the beef slices and serve with some extra 
    sauce on the side.    
  

Sunday, October 6, 2013

Very Simple Roasted Chicken - Filipino style

Copyright 2013 LtDan'sKitchen blogs
Okay, This recipe was created out of necessity and just because I wanted a roast chicken but did not want to buy it from one of the many stalls that sell roasted chicken dotting the city. I used to roast meat a lot from chicken to pork and even turkey but I seldom do that here since I came home last year. It might be due to the fact that a tank of gas for cooking is a bit expensive or that my oven is not the best oven in the world and setting it to the right temperature is a pain. Either way, I'm starting to roast meat again albeit not very often. 

This roast chicken is very simple in that I want it again to be the most basic it can be without sacrificing the flavor. I think I managed to achieve that and with the gravy that went with it, it was one delicious and simple dish that any novice can pull off. Just try and make sure that you have a meat thermometer to ensure that the bird is cooked properly. 

Roast Chicken - Filipino Style. 

2 lb young chicken
2 small carrots, quartered
2 celery stalk
1 small bundle of lemongrass
2 tbsp butter
4 garlic cloves, crushed
salt and pepper
4 tbsp vegetable oil

1. Preheat the oven to about 375°F. Prepare a 9x13 baking pan by lining with
    foil and arranging the carrots, celery and garlic cloves for the chicken to 
    rest on. Set aside.

2. Season the cavity of the bird with salt and pepper and stuff with the butter
    and the lemongrass. Secure the legs of the bird and season with more salt 
    and pepper. 

3. Arrange the bird on top of the vegetables and drizzle it with the oil. Bake 
    in the oven for about 2 hours or until the skin has turned a golden brown 
    and the meat thermometer registers 180°F.

4. Let the bird rest for 10 minutes before carving. Serve with the carrots and
    the garlic cloves.

5. To make the gravy, collect the drippings in a small potand over medium 
    heat, thicken with about 2 tbsp of flour. Once it starts to thicken, add a 
    tablespoon of butter and continue to cook until the butter has melted. 
    Check for seasoning and correct accordingly. If too salty, thin out with a 
    little bit of water. 

Balbacua Cebu via Bacolod

Copyright 2013 LtDan'sKitchen blogs
This is a doctor's nightmare come to life in a bowl but definitely a gastronomic delight. Considered a street food in Cebu, this dish is definitely very unique in the same manner that Kansi is unique to Bacolod or the KBL to the Visayan region. A testament to living in Asia where every bit of animal part is used to maximize the use of a domesticated animal, this dish uses ox cheeks, feet and tail. If you are from the West, you might think it very unappetizing and indeed, as Andrew Zimmern would refer to such fare, bizarre.  However, with an open mind, you might just learn to love this dish.

I normally don't use these animal parts because I never learned how to cook them properly. It was just upon the urging of a good friend that I decided to give it a try. My first introduction to the dish was months ago in a small eatery outside the hotel we were staying at during a conference. For the meager and almost dilapidated look of the place, I was surprised and thought that they had the best omelet, hands down. I ordered those bad boys for breakfast every morning with no fail. It was during one of our visit however, that I came upon this dish. My friend who hails from Cebu ordered the dish and with me having gout issues, I watched in awe and a bit of concern for him at the same time as he ate the dish with such gusto. I was also left wondering as to how he can enjoy such fare when all I see is cholesterol in stew form. I decided I wanted to give it a try the next day but unfortunately, they did not have it and we were scheduled to go home the next day so I never learned how it tasted. Thus, it was left in the back burner until it kept popping into my head a number of times. My final inducement was from the said friend who finally told me to make it and so I did using this recipe as my starting point. Do read the blog post if you have the time for it is quite hilarious.

Balbacua Cebu via Bacolod

8 lbs ox tail, cheeks or feet, cut into serving pieces
6 star anise
2 onions, diced
4 garlic cloves, minced
6 bay leaves
1/2 cup dried white beans, soaked overnight
1 /4 cup salted black beans, drained
1 inch ginger, peeled and sliced thinly
1 small bundle of lemon grass stalk
1/2 tsp red pepper flakes
1 picante chile
10 cups beef broth
salt and pepper
4 tbsp vegetable oil
9 saba half-ripe bananas, peeled and halved
1/3 cup green onions, diced

1. In a large pot over medium high heat, boil the meat with the bay leaves 
    and half the onions. Season with salt and pepper. Continue to boil for 
    another 20 minutes. Discard the liquid and rinse the meat thoroughly. 

2. In another large pot over medium high heat, saute the garlic with the 
    remaining onions in the vegetable oil until slightly browned and season 
    with salt and pepper. Add the ginger, star anise, red pepper flakes and 
    the lemon grass and saute for another minute. 

3. Add the soaked white beans and black beans and mix until seasoned. Pour
    in the broth together with the meat and bring to a boil. 

4. Once boiling, adjust the heat to medium low and simmer covered. This 
    will be the longest part of the cooking process. Simmer for about 5-6 
    hours or until the meat is very soft and is almost falling apart. Add more 
    water if necessary making sure you have enough broth covering the 
    simmering meat. 

5. Add the bananas and the picante pepper when the meat is almost ready 
    and cook until the bananas are soft and yet still hold their shape. Check 
    for seasoning and adjust accordingly. Serve with a sprinkling of the green 
    onions. 
 

Saturday, September 21, 2013

Danish Braised Chicken

Copyright 2013 LtDan'sKitchen blogs
It is a rare occasion when you are presented with a dish that requires only four ingredients and have it come out so finger-licking fantastically good. Such is the case with this braised chicken dish. Adapted from the cookbook gifted by my Danish friend, I was really skeptical at first but was totally convinced by the time I was done eating. I also served it to my two friends and short of devouring a whole chicken between the three of us, what was left was half a chicken breast which was packed to go by one of my friends and the neck part which I ate for lunch the next day. 

The dish was originally served with a cucumber salad but I'm not a big fan of pickled cucumbers so I paired it with a vegetable salad. However, I realized that boiled baby potatoes seasoned with olive oil and the usual salt and pepper was the best side dish since you get to eat them with the thick creamy gravy that is nothing really but melted butter and cooked cream. Need I say more? This is one awesome dish. Word of warning though: not for those with cholesterol problems. I'm not kidding. Stay away from this dish!

Danish Braised Chicken - Adapted*

1 2-3 lbs whole chicken, trimmed
1/2 cup butter, unsalted
1 cup heavy cream
salt and pepper
1/4 cup fresh parsley 

1. Season the chicken with salt and pepper on the outside and in the cavity. 
    Stuff with the parsley leaves and half the butter. Secure the legs with a 
    butcher's twine and set aside. 

2. In a large skillet, melt the butter over medium low heat. Once melted, 
    increase the heat to medium high and brown the whole chicken on all 
    sides. 

3. Add half the cream and decrease the heat to low and simmer the chicken 
    covered for about an hour or until the juices run clear when you pierce 
    the thigh. Turn the chicken occasionally during this time.

4. To complete the dish, add the remaining cream and simmer for another 
    10 minutes. 

5. To serve, cut the chicken into large pieces and drizzle the sauce over it. 
    Best served with boiled baby potatoes. 

* Forlag, N.N.; Busk, A., Dining With The Danes, Clemenstrykkeriet, Copenhagen: 2011.

Tuesday, August 27, 2013

Salisbury Steak

Copyright 2013 LtDan'sKitchen blogs
Let me narrate the reason why I made this dish a few weeks ago. I teach a masteral course every Saturday in the city campus of the University that I work for. It is an hour away from the main campus and another hour away by ferry to my home in Bacolod. So I have to follow this schedule every Saturday where I wake up at 5am in the morning to haul my bags to teach at the city campus and then after my class, I go home for the weekend. Well, in one of those weekends, I sat in front of someone in the ferry boat who bought takeout food from a food chain and it was Salisbury Steak. It was torture for someone who had no lunch and was sleepy and tired from the travel and had to teach for four hours straight that very morning. 

It was then decided in my mind that I was going to make my version of the food that was now ingrained in my mind. I remember making this dish a long time ago using Rachel Ray's recipe but I wanted to try something different. Okay, I have to admit, she has been annoying me lately so whose recipe do I follow? It was none other than Martha Stewart, another person who annoys the hell out of me. Anyway, the need to make the steak was much stronger than my personal issues so I went ahead and used her recipe. Let me just say it now, it was delicious. 

Salisbury Steak - Adapted*

2 lbs ground beef
1/2 cup panko or white bread crumbs
1/2 cup while milk
1 large onion, grated
1 cup Shitake mushrooms, diced
2 cups beef broth
1 large egg
2 tbsp chopped parsley
2 tsp Worcestershire sauce
1 tsp corn starch + extra for dusting
vegetable oil
salt and pepper

1. In a large bowl, combine the meat, half of the onions, bread crumbs, egg, 
    milk, parsley and Worcestershire sauce. Season with salt and pepper. 
    Combine well and divide into 10 patties. Set aside.

2. In a large pan over medium heat, add enough vegetable oil to fry the 
    patties. Dip each patty into the extra corn starch and tap off the excess. 
    Fry in the vegetable oil for about 5 minutes or until browned. Turn with a 
    spatula and cook for another 3 minutes or until browned. Fry all the 
    patties and set them aside.

3. In the same pan used to fry the patties, saute the onions and mushrooms 
    and cook for about 5 minutes or until slightly caramelized. Add the beef 
    broth and bring to a boil. Once boiling, lower the heat to low and bring to 
    a simmer.

4. Dissolve the teaspoon of cornstarch in 1/4 cup water and add to the sauce.
    Season with a few dashes of Worcestershire sauce.

5. Return the cooked patties into the gravy and cook until just heated 
    through. Serve immediately with mashed potatoes or steamed rice. 

*Martha Stewart: Salisbury Steak with Onion Gravy    

Saturday, August 10, 2013

Chicken and Potatoes

Copyright 2013 LtDan'sKitchen blogs
Chicken and Potatoes was a surprise hit for our Thursday dinner bash. Based on Lidia's recipe on her Lidia's Italy website, it was indeed something to brag about. No wonder her family asks for it a lot. A simple dish cooked without a lot of fuss but with all the rich flavor of what you will expect from slaving for hours in the kitchen, this dish will not disappoint. I made it with bits of bacon to flavor the frying oil and the chicken took on the flavor of bacon which is always a good thing. I also used baby potatoes which I cut in half and it cooked to such tender perfection it balanced the dish really well. You do need to fry a lot but you can keep your eye on how much oil you use. The caramelization that came from some parts of the chicken sticking to the pan actually added to the overall flavor of the dish. It is definitely a family dish to share and enjoy with your loved ones.

Chicken and Potatoes - Adapted*

2-3 lbs chicken thighs
1 lb baby potatoes, halved
1 large onion, sliced
1/2 lb bacon
6 garlic cloves, minced
1/4 cup vegetable oil
2 tbsp olive oil
salt and pepper
1/2 tsp dried rosemary
2 tbsp parsley, chopped

1. Heat the skillet over medium heat and brown the bacon until crisp and 
    crunchy. Spoon them out and set aside. Add about half of the vegetable 
    oil and increase the heat to medium high. 

2. Season the chicken with salt and pepper and in the same skillet, brown 
    the chicken pieces in batches. Set them aside. Add more oil when 
    needed during the browning process. Reduce the heat to medium.

3. Drizzle the olive oil over the potatoes and season with salt. Mix well. Fry 
    them in the same skillet cut side down and fry them until crisp. Invert 
    the potato halves and fry them until crispy on the other side. 

4. Add the onions and rosemary and season with salt and pepper. Mix them 
    together to saute. Return the chicken pieces and toss them all to 
    combine. Spread them out on the pan and cook covered for about 7 
    minutes. 

5. With your spatula, retoss and spread out the chicken and potatoes 
    making sure that you scrape the browned pieces stuck on the pan. Cook 
   for another 7 minutes covered. 

6. For the last time, toss and combine and cook covered for another 10 
    minutes. After 10 minutes, scrape with your spatula to release the chicken
    and potatoes stuck on the pan. Cook uncovered for another 10 minutes. 

7. Check for flavor and correct the seasoning. Crumble the browned bacon 
    and toss into the mix and garnish with the chopped parsley and a good 
    drizzling of extra virgin olive oil.

*Lidia's Italy: My Mother's Chicken and Potatoes recipe.   
   

Wednesday, July 17, 2013

Chicken with Lentils

Copyright 2013 LtDan'sKitchen blogs
The recipe is a take on Nigella Lawson's recipe of poached chicken with lentils and tested by Jennifer Bain of the Toronto Star. I took it a little further and infused it with a hint of Morocco while taking a small turn towards the Indian continent. Lentils was my go-to substitute for mung bean while still living in the US. Although usually cooked until just tender, I would normally cook it until it is very mushy which is also how I like to cook my mung bean in a stew. However, I have also come to appreciate lentils as they are when I prepare Indian food and I do adhere to the proper way of cooking them which is almost al dente. 

Although it started out as a light fare, I pumped up the flavors by marinating the chicken in harissa. Frying the chicken until browned brought out the flavors of the marinade which was both spicy and sweet . I also used cilantro to finish the dish giving it a pungent aromatic scent which I do like since I'm not too partial on mint leaves that the original recipe called for. Overall, this was a successful experiment and between the five of us who partook of the dish, we lopped it up until we were full to the brim. Undo my belt please, I'm too full! 

Chicken with Lentils

2 lbs chicken cut up
1/4 cup harissa
1 lemon
4 garlic cloves, minced
1 large onion, diced
2 medium-sized carrots, diced
1/2 lb bacon
1 cup French green lentils
4 cups chicken broth
1 tsp mustard powder
1/4 cup parsley, chopped
2 tbsp cilantro, chopped
4 tbsp vegetable oil
salt and pepper

1. Season the chicken with salt and pepper and add the harissa. Zest the 
    lemon and cut in half. Juice the lemon halves and remove the seeds. Add 
    the zest and the juice to the chicken. Mix well and allow to marinate for 
    an hour. 

2.  Brown the bacon in a large pan over medium heat until crisp. Transfer to 
     a plate and set aside. 

3. Add the oil to the bacon fat and increase the heat to medium high. Brown 
    the chicken pieces. Do this in batches. Transfer the chicken pieces to a 
    plate and set aside. 

4. In the same pan, saute the garlic and onions and season with salt and 
    pepper. Cook until just softened. 

5. Add the mustard powder and the lentils and mix well. Return the chicken 
    pieces into the pan and add the broth. Stir to mix. Bring to a boil and 
    cover. Cook for 10 minutes. 

6. Lower the heat to low and bring the pan to a simmer. Check occasionally 
    and stir to make sure the lentils do not stick to the pan. Cook for another
    10 minutes. 

7. Add the diced carrots and check the stew for flavor. Adjust when 
    necessary. Add more water if it gets a bit thick. Cook until the lentils are 
    tender but still hold their shape.

8. To finish the dish, slice the bacon into smaller pieces and add them to the 
    stew. Check for flavor one last time and adjust accordingly. Stir in the 
    chopped parsley and cilantro just before serving.

Saturday, May 25, 2013

Ox Tongue in Mushroom Sauce with Risotto Alla Milanese

Copyright 2013 LtDan'sKitchen blogs
Hosted another dinner party at the request of one of my very best friends since her family will be in town to attend a family wedding. I usually cook dinner every time she is in town after informing me a few weeks earlier of course, that she is flying in (with my godson usually) and what it is they want to eat. That or we go out if I don't have the time to cook. For this dinner however, her husband requested ox tongue which is something I've done before as a dare to my American and European friends. My only concern is whether if I could find a meat shop that carries quality ox tongue and well, the amount of work it will take to cook the dish. 

Copyright 2013 LtDan'sKitchen blogs
Ox tongue is usually cooked in a sweet peppery sauce flavored with pineapples as a sweetener. For me however, I prefer to cook it in a thick mushroom gravy served over risotto or a garlic-infused mashed potato. Both are equally good but the former is typical of a dish served during weddings or fiestas while my version is more suited for fine dining in my house as it invokes touches of the French style of cooking. Okay, I'm not being snooty, I'm just saying that I prefer to cook my ox tongue a bit differently. My friends loved it so I'm relieved that my efforts paid off. Anyway, I only took the before picture but spared you from the messy in-between takes of the preparation. Might have been a good idea but pictorially, it will be a bit of a mess. So, if you are really interested in making this dish, I can direct you to a few videos that go over this in detail.

Ox Tongue in Mushroom Sauce with Risotto Alla Milanese

8-10 lbs ox tongue (each tongue weighs about 4-5 lbs)
8 bay leaves
1 tbsp peppercorns
1/2 cup white vinegar
1 lb dried shitake mushrooms
1 tbsp salt (for parboiling)
1 large carrot
2 large onions, quartered
4 garlic cloves, mashed
1/4 cup butter or margarine
2 tbsp flour
1 tbsp black truffle oil
6 tbsp olive oil
2 beef stock bouillon 
1 tbsp Worcestershire sauce
salt and pepper
Risotto Alla Milanese

Parboiling and Cleaning:

1. In a large pot, combine the ox tongue, 4 bay leaves, peppercorns, white 
    vinegar and enough water to cover the tongue. 

2. Bring to a boil and cook for at least 30 minutes or until the tongue has 
    shrunk to about half its original size. 

3. Remove from the cooking liquid and allow to cool. Discard the cooking 
    liquid. 

4. Once the tongue is cool enough to handle, clean it off by removing the skin
    using a knife. I sometimes use a vegetable peeler. Rinse and set aside for 
    the next step.   

Main Preparation:

1. In a large pot, heat the olive oil over medium high heat. Add the onions, 4 
    bay leaves and the garlic. Season with salt and pepper and saute until the 
    onions are slightly browned. 

2. Add the tongue and brown on both sides. Pour in enough water to cover 
    the tongue and drop in the carrots and the beef bouillon. Bring to a boil.

3. Once the pot is boiling, cover and simmer for 3-4 hours or until a knife 
    goes through the thickest part of the meat easily. Remove the tongue and 
    allow it to rest. Save the cooking liquid.

4. To prepare the sauce, melt the butter in a saucepan over medium heat. 
    Add the flour to make a roux.

5. Pour the cooking liquid onto the pan over a sieve. Mash the carrots and 
    onions and force it through the sieve. 

6. Stir and cook over medium heat until thickened. Add the truffle oil and 
    Worcestershire sauce. Check for flavor and season with salt and pepper. 
    If too salty, just add more water.

7. Slice the cooled meat into thin slices and add into the gravy. Simmer 
    over low heat until ready to serve. 

Sauteed Shitake Mushrooms:

1 lbs fresh mushrooms, sliced
2 garlic cloves, minced
4 tbsp olive oil
1 tsp black truffle oil
salt and pepper
   
1. In a saucepan, heat the olive oil over medium high heat. Add the garlic and
    saute until just softened. 

2. Add the mushrooms and season with salt and pepper. Continue to cook 
    until the mushrooms have softened. Drizzle in the truffle oil and remove 
    from the heat. 

To assemble this dish, spoon out a good amount of Risotto Alla Milanese and top with 3-4 slices of the ox tongue. Top with a tablespoon of sauteed mushrooms. Drizzle with the gravy and garnish with a sprig of parsley.