Recipes

Wednesday, October 26, 2011

Panna Cotta

Copyright 2011 LtDan'sKitchen blogs
To me, this Italian dessert is Italy's version of flan. However, one advantage of this dessert is that it is a lot easier to make compared to traditional custard desserts. The secret ingredient is basically the gelatin added to the cooked cream. This eliminates the long cooking process over a steamer or a water bath and yet you end up with an elegant dessert that is quite sinful in its simplicity. There are numerous version of panna cotta but I'll stick to Michael Chiarello's version that is flavored with honey. One word of caution, go easy on the honey. I once made it with too much honey and I ended up with an overly sweet dessert. As the saying goes, too much of a good thing is not always good for you.

Panna Cotta - Adapted*

Copyright 2011 LtDan'sKitchen blogs
3 cups heavy cream
2 1/2 tsp gelatin
1/2 cup sugar
1 tsp vanilla
2 tbsp honey per serving

1. Heat the cream with 
    the sugar over low 
    heat and bring to a 
    simmer. In the 
    meantime, drizzle 2 
    tbsp of honey per 
    ramekin and spread it 
    around until it you get 
    an even coating. Set aside in the fridge. 

2. In a bowl, mix the vanilla with the gelatin. Add about a cup of the heated 
    cream and mix well. Return mixture to the pot and combine with the rest 
    of the cream. 

3. Stir until the gelatin has completely dissolved. Through a strainer, carefully 
    pour the warm cream over the honey-coated ramekin. Cool for at least 4 
    hours in the fridge.

4. To serve, dip the ramekin in warm water for about 10 seconds and 
    loosen the sides with a sharp knife dipped in hot water. Invert onto a 
    plate and serve as is or garnished with fresh berries or chopped toasted 
    almonds or hazelnuts. 

*Food Network Channel, Easy Entertaining with Michael Chiarello: My first Dinner Party episode

Monday, October 24, 2011

Chicken Curry

Copyright 2011 LtDan'sKitchen blogs
We seldon use curry in our dishes but this is one exception. This curry dish is more sweet in terms of overall flavor rather than spicy hot so this might be a big hit to those who would like to try something different and yet not worry about how exotic or spicy hot the dish will be for their palette. I prefer to cook this with chicken but beef and even shrimp have been used for this dish as well. I try to use just enough curry spice to flavor the dish without overpowering it. Turmeric powder is also a crucial ingredient which imparts the yellowish color to the sauce. 

Our family did not discover this dish until I was in high school. It was a cousin who worked in a restaurant that first introduced this dish to us in one of our family gatherings and from then on, it has managed to become one of the favorite dishes we cook. The dish can also be made spicy by adding a dash of cayenne pepper and it does work well if you prefer your food on the hot side. For out family however, it always borders on the sweet side. 

Chicken Curry

Copyright 2011 LtDan'sKitchen blogs
2-3 lbs cut up chicken
3-4 garlic cloves, minced
1 medium onion, diced
3 bay leaves
4-6 tbsp canola oil
salt and pepper
1 tbsp fish sauce
1 cup broth
1 14 oz can coconut milk
2 tbsp curry powder
2 tsp turmeric powder
3 medium sized potatoes, 
  peeled and cubed
4-6 medium sized carrots, 
  peeled and cubed
1/2 cup frozen peas

1. Heat 2 tbsp of oil in a deep pan over medium heat and saute the onions 
    and garlic until softened. Season with salt and pepper. Add the bay 
    leaves and cook for another minute.

2. Add the chicken, skin side down and brown slightly. Season with salt and 
    pepper. 

3. Add the coconut milk and the broth and bring to a boil. Lower the heat 
    and simmer for 30 minutes. In the meantime, heat another skillet with 
    the rest of the oil and heat at medium heat. Fry the potatoes until crisp 
    on all sides. It does not have to be fully cooked. Set aside. 

4. Once the chicken has finished simmering, add the potatoes and the 
    carrots and cook for another 15-20 minutes until the potatoes are fully 
    cooked. If the sauce gets too thick, add some water to thin it out. 

5. Adjust the flavor with salt and if you prefer, the fish sauce. Add the 
    curry and turmeric powder and mix well. 

6. Add the peas and cook until it turns bright green. Serve warm with 
    steamed rice.

Brazo de Mercedes

Copyright 2011 LtDan'sKitchen blogs
The Arm of Mercedes, or Brazo de Mercedes is a delicious dessert with a macabre name. How this dessert ended up with this name is beyond me and there seems to be no record of the history of this dessert. All I can say about it is that it will definitely cure your sweet cravings and more. A bit on the unhealthy side, one slice is all you need to satisfy your cravings although the lightness of the dessert will fool you into eating more than just one slice. Two or three is more the norm for me so I rarely make it.

My Mom's friend makes an awesome version of this cake but she sells them for profit so asking her for the recipe is pointless. I did find a couple of recipes that have worked for me and the two favorites of mine are very similar so there is no need to chose one over the other. My friend Mara was the one who requested me to provide her with a good recipe since she wanted to bake this for a party so despite my initial misgiving, there was really no need to twist my arm and I happily agreed to do this for her.

Brazo de Mercedes

Copyright 2011 LtDan'sKitchen blogs
10 large eggs, separated
1 cup white sugar
2 tsp vanilla extract
1 tsp cream of tartar
1 can condensed milk
confectioner's sugar

1. On a double broiler, 
    combine the con-
    densed milk and the 
    egg yolks and keep 
    stirring until the 
    mixture is very thick. 
    Take care that it does 
    not curdle so keep the water at a simmer. Add half the vanilla and let 
    cool. Cover with clingfilm to avoid forming a skin. 

2. Once the filling is at room temperature, preheat the oven to 350°F.

3. Add the cream of tartar to the egg whites and beat at medium speed 
    until frothy. Once you reach the soft peaks stage, gradually add the sugar 
    and increase the speed to high and beat until stiff peaks are formed. Add 
    the remaining vanilla and mix well.

4. Spread the meringue on a greased and lined baking sheet (15x17) and 
    bake for 15 minutes or until the top is golden brown.

5. Turn off the oven and let the meringue cool with the oven door ajar for 
    about 10 minutes. Remove from the oven and cool for another 30 
    minutes. Dust with a good amount of confectioner's sugar and cover with 
    another sheet of parchment paper. Invert onto another baking sheet and 
    peel off the parchment paper the meringue was baked in.

6. Spread the filling evenly and start rolling from the short side using the 
    parchment paper as a guide. Brush off the excess sugar and transfer to a 
    serving plate and refrigerate until ready to serve.

Notes:
The cooling time for the meringue may vary. I was baking this cake last night when the temperature outside the house was 30°F so it was still cold in the kitchen. You want to make sure that the meringue is cool enough that when you dust it with the sugar, it wont melt it because you will end up with a sticky mess. Still edible, but not as pretty. 

Also, the filling could have been a lot thicker. I was just finishing up the cake in record time so keep cooking the custard until it coats the back of the spoon and doesn't drip. It still has to be spreadable so you need to figure out how thick you want your filling to be. Either way, it will still taste delicious!

Simple Chicken Salad Sandwich

Copyright 2011 LtDan'sKitchen blogs
I have a distinct memory involving a chicken sandwich since I had an unfortunate experience with one as a 4th grader. We were in this restaurant, Roli's, back in my hometown that was just across the street from my school and a classmate was celebrating his birthday there so we were present for this special occasion. I ordered a chicken sandwich of all things and unfortunately for me, my sandwich never came. The governess of a classmate (yes, I had rich classmates while I was on an academic scholarship) had to remind the waiter that I never got my food. Turned out they forgot about my order since everyone was having either hotdogs or burgers. By the time I had my sandwich, everyone was already having lots of fun playing games and winning prizes. Me sitting in a corner eating my sandwich may sound depressing but the thing was, it was the best sandwich I ever tasted in my entire 11 years of life. That flavor was forever burned in my memory and until now, I'm still trying to figure out how that chicken salad was made. 

Copyright 2011 LtDan'sKitchen blogs
I've had my fair share of chicken sandwiches over the next 20 or so years of my life and most of them have been made by me trying out various recipes to find this elusive taste. For now, I've settled on this very basic recipe which I think is the closest thing to the sandwich I ate a long time ago. I do eat my sandwich with a bit of a flair now and garnish it with slices of gala apples. My choice of meat is the white meat from commercial rottiserie chicken although you are welcome to make your own by cooking chicken pieces in a seasoned broth until tender.   

Simple Chicken Salad Sandwich

Copyright 2011 LtDan'sKitchen blogs
2 cups cooked chicken 
  meat, diced
1/3 cup mayonnaise
1/2 tsp tarragon
salt and pepper
1/3 cup celery, finely diced
1 tbsp pickle relish
Gala apple, sliced thinly
Iceberg lettuce
slices of bread

1. To make the salad, 
    combine the chicken, 
    mayonnaise, tarragon 
    pickle relish and 
    celery. Mix well and adjust the seasoning with salt and pepper. 

2. Lay slices of Gala apples on a bread and scoop a generous amount of 
    chicken salad on top of it. Layer lettuce leaves over the salad and top 
    with another slice of bread. 

3. Slice in half and enjoy with a friend or solo.  

Friday, October 21, 2011

Granny's Donuts

Copyright 2011 LtDan'sKitchen blogs
It has been a week since I decided to go back to my diet and strictly count portions again. I have been a bit lenient on how much I eat and I just balance it out with exercise. However, I needed to go past this stasis state and start losing more weight again. It has been a wonderful week of feeling the hunger pangs and eating just the right amount of food to sate it and then comes Friday and the first thing on my mind is coffee and donuts. Perfect for this cloudy and cold day and with half the lab craving donuts as well, I took the plunge. 

The favored donuts came from Grandma's Donuts on campus while I prefer the Town and Country version since they have a cinnamon roll/donut concoction that I really love. Since half the lab is chipping in, I had to go with Grandma's donuts. This is the closest thing to a homemade donut in town with fresh fruits as toppings most of the time. Even their chocolate glaze is made with chocolate ganache. Now, who could resist that? My diet will have to wait for tomorrow. Today will be cheat day!

Saturday, October 15, 2011

Ravioli

Copyright 2011 LtDan'sKitchen blogs
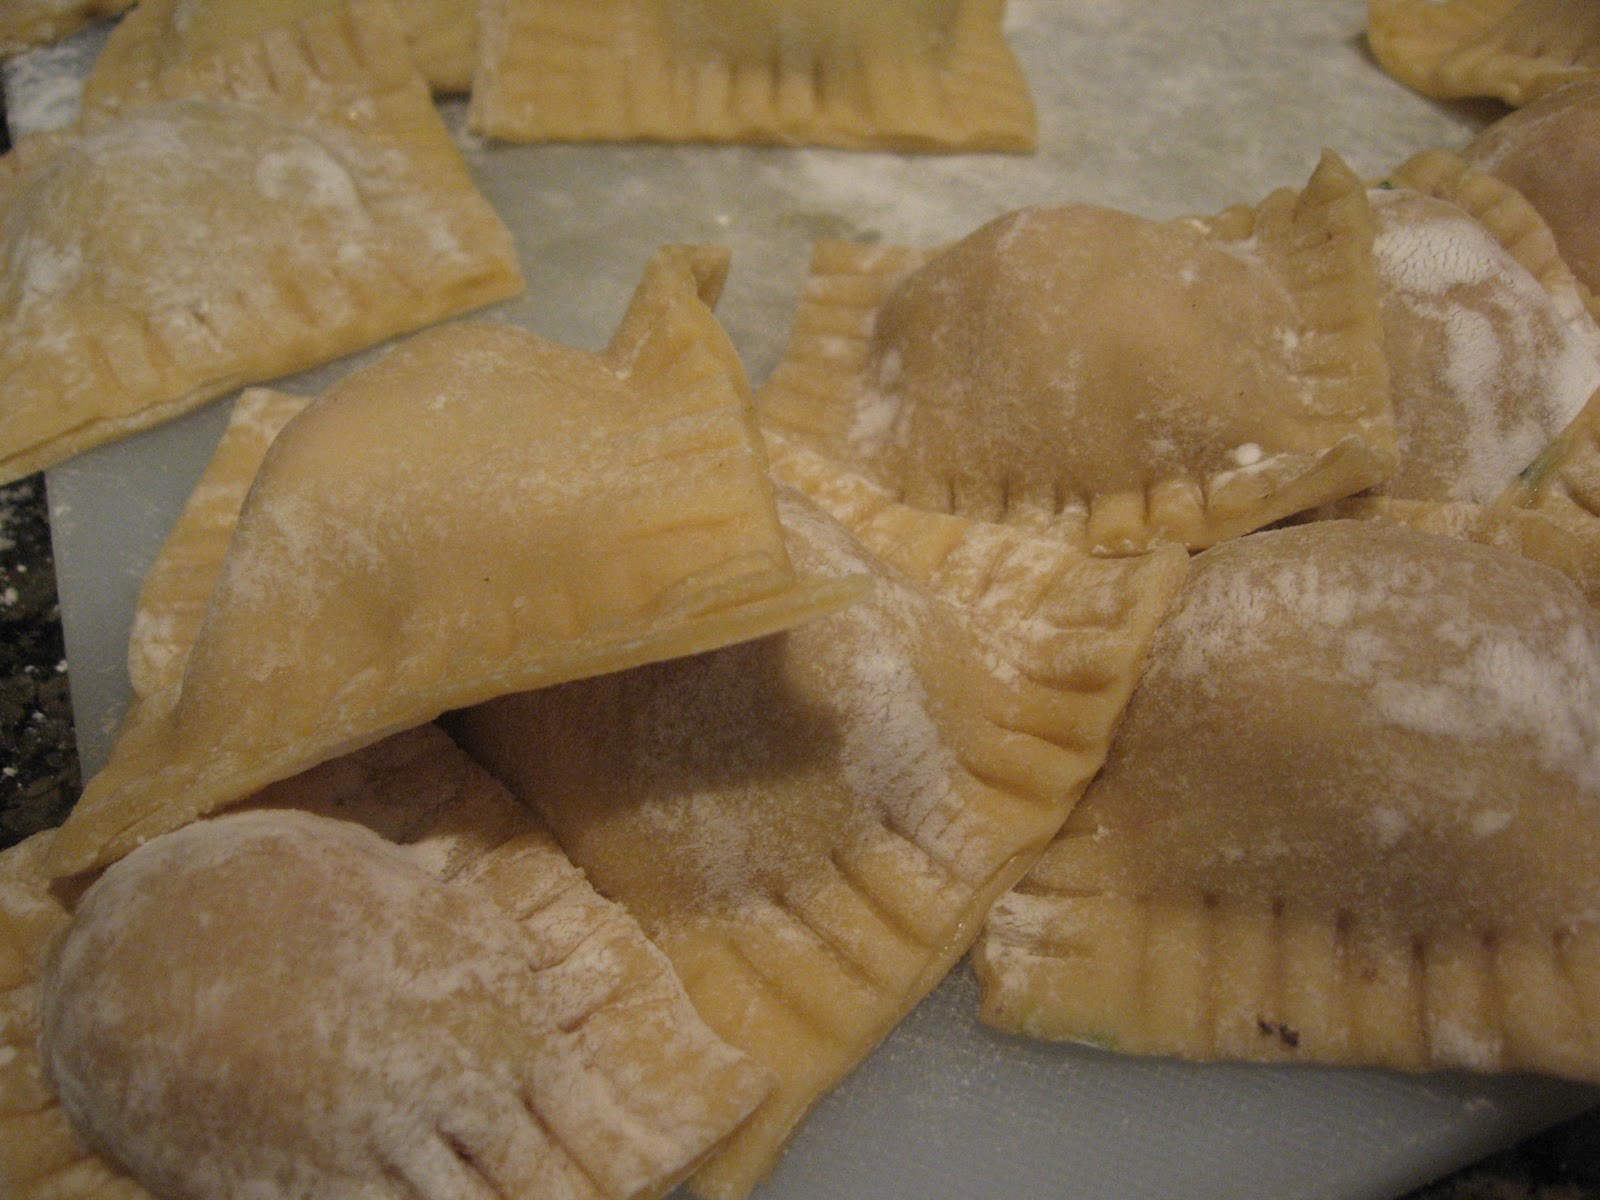
My first attempt at making ravioli is by using wonton wrappers as the pasta since I did not venture into pasta making at that time. It was a Thanksgiving inspired ravioli using Giada de Laurentis recipe of turkey with cranberries filling in a butter sauce. It was an interesting experiment and one that my roommate at that time thought was unusual but ate anyway.

After purchasing my pasta maker, I have made ravioli a number of times but I have stuck to a much more simple varaiation with the filling which usually includes a combination of sausage, spinach, and cheese. The choice of the sauce is up to you but a good pesto sauce or a simple red gravy will do. Just make sure that you cook it right and all will be well

For the pasta, I'm following Lidia's recipe on her website. If you do want to skip this step, buy the Nasoya wonton wrappers. The basic egg pasta recipe from Lidia is good for one recipe of filling as outlined below. Instructions on how to make ravioli is also described in this post from Lidia. 

Sausage and Spinach Filling

1/2 lb pork sausage
1/2 lb ground pork
1 egg
2 tbsp grated Pecorino Romano cheese

Combine all ingredients until ready to use. 

I like pairing this with a tomato based sauce. I make my own sauce and it is quite simple. I also make just enough to pair with a batch of sausage ravioli. This is a case where less is more.

Basic Tomato Sauce

Copyright 2011 LtDan'sKitchen blogs
14 oz can diced tomatoes
1 onion, diced
3 garlic cloves, minced
2 tbsp olive oil
1 cup water
salt and pepper
1 tsp fresh oregano
1/2 tsp thyme

1. In a deep skillet, heat 
    the oil at medium heat.
    Saute the onions and 
    garlic until softened. 
    Season with salt and 
    pepper. Add the diced tomatoes and water and bring to a boil. 

2. Lower the heat to simmer and add the herbs. Let it simmer covered 
    for 30 minutes and adjust the flavor with salt. Set aside until ready to 
    use. 

To prepare the ravioli, simmer the sauce and transfer the ravioli from the cooking liquid into the tomato sauce. Let it simmer for about 5 minutes and off heat, add about 1/4 cup of Pecorino Romano cheese. Garnish with chopped parsley. 

Mushroom and Ricotta Filling

1 cup Ricotta cheese, full fat
1/2 lb button mushrooms, diced
8 oz frozen spinach, thawed and drained
1 onion, finely diced
2 garlic cloves, minced
2 tbsp olive oil
salt and pepper
1 egg

1. Heat oil in a skillet over medium heat. Add the garlic and onions and saute 
    until softened. Season with salt and pepper. 

2. Add the mushrooms and saute until softened, about 5 minutes. Season 
    with salt. Let it cool. 

3. Add the rest of the ingredients and mix well. 

For the Mushroom Ricotta ravioli, I want a sauce that will enhance the mushroom flavor without overpowering the ravioli. To do this, I'm reconstituting dried porcini mushrooms to flavor the sauce and ricotta to give this ravioli a creamy yet earthy flavor. 

Mushroom and Ricotta Sauce

1 oz dried Porcini mushroom
1 cup hot water
1/4 tsp chili flakes
1/4 cup Pecorino cheese
2 tbsp unsalted butter
2 tbsp Ricotta cheese

Copyright 2011 LtDan'sKitchen blogs
Reconstitute the mushroom in the water and set it aside until it softens. Heat the butter in a skillet at medium heat and add the pepper flakes and saute for a minute. Add the mushrooms including the reconstituted water and let it simmer. Transfer the ravioli from the cooking liquid and finish cooking in the mushroom sauce. You can also add more pasta water if the sauce gets a bit dry. Add the ricotta and off the heat, add about 1/4 cup of Pecorino Romano cheese. Garnish with chopped parsley. 

Arroz Caldo ala Risotto

Copyright 2011 LtDan'sKitchen blogs
This recipe was inspired by a soup that is commonly made back home when you are sick or when the weather turns cold or rainy or when a soup is the only way to fill the hunger pangs in your tummy. The soup Arroz Caldo (rice soup) is very simple to make but I wanted something a bit different in terms of texture while retaining the flavor so I decided to turn what was a soup into a risotto dish. The base for the soup is chicken broth with chicken pieces and rice is added to give body to the soup so transitioning from soup to risotto is not really a stretch. The soup is usually served with toasted garlic and green onion slices and I'm sure it will work in a risotto dish as well. 

Arroz Caldo ala Risotto

2 lb chicken
3 cups Arborio rice
1 onion diced
6-8 garlic cloves, minced
4 stalks green onions, finely diced
1/4 tsp turmeric powder
salt and pepper
2 bay leaves
8 tbsp olive oil 
sesame oil

1. In a big pot, heat 3 tablespoons of oil at medium heat and saute half the 
    onions and a teaspoon of minced garlic until softened. Season with salt 
    and pepper. Add the bay leaves and saute for another minute. 

2. Add the chicken pieces and brown on both sides. Season with salt and 
    pepper. 

3. Add 8 cups of water and bring to a boil. Simmer for 30 minutes and 
    check the broth for flavor. 

4. To make the risotto, heat 3 tablespoons of oil and saute the onions in 
    a deep skillet until softened. Season with salt and pepper. 

5. Add the rice and stir until the rice is coated with the oil. At this point, 
    start adding the broth in small batches until the rice is al dente as 
    described in the risotto posting. Add the turmeric powder and mix well.

6. To serve, toast the remaining garlic until golden brown at low heat in a 
    pan with 2 tablespoons oil. Drain on paper towels when browned. 
    Debone and skin the chicken meat and slice into wedges. Arrange the 
    chicken pieces on top of the risotto and garnish with the green onion 
    and toasted garlic. Drizzle sesame oil on the toppings as a final touch. 
    Serve warm.